Android Studio
Android Studio is an IDE developed by Google, built on JetBrains’ IntelliJ IDEA software and designed specifically for Android development.
https://developer.android.com/studio
Table of contents
🔲 → Optional
✅ → Required
🔘 → Pick One
ℹ️ → Information
IDE
macOS
✅ Installation
- Visit https://developer.android.com/studio
- Click
Download Android Studio Xxx- Select
I have read and agree with the above terms and conditions- Click
Mac with Intel chiporMac with Apple chip- Open
android-studio-xxx.x.x-mac.dmginDownloads- Drag
Android Studioto theApplications
Windows
✅ Installation
🔘 Chocolatey
choco install androidstudioOpen
Command Promptwith administrator privileges🔘 Setup Wizard
- Visit https://developer.android.com/studio
- Click
Download Android Studio Xxx- Check
I have read and agree with the above terms and conditions- Click
Download Android Studio Xxx | xxxx.x.x for Windows- Open
android-studio-xxx.x.x-windows.exeinDownloads- Do installation procedures of Setup Wizard
SDK
✅ Installation
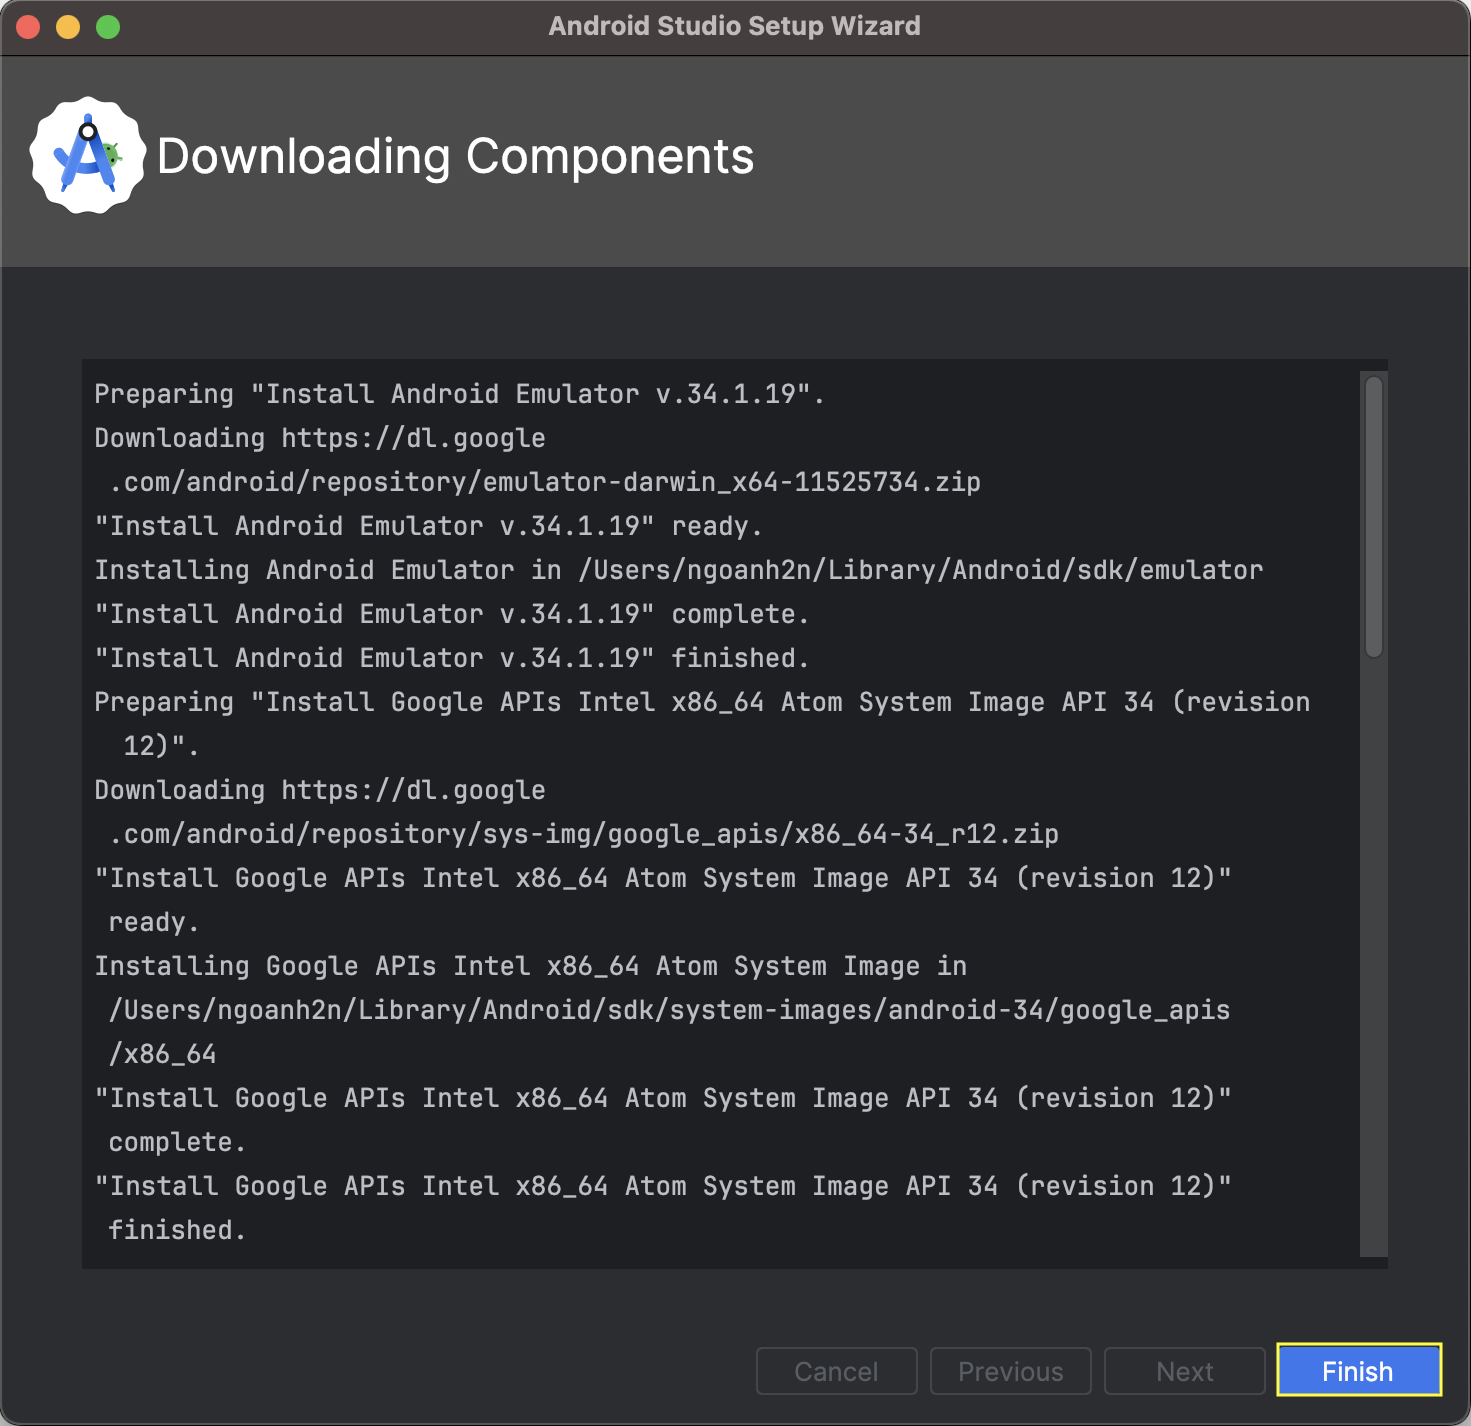
🔘 Setup Wizard
When opening for the first time after installed Android Studio.
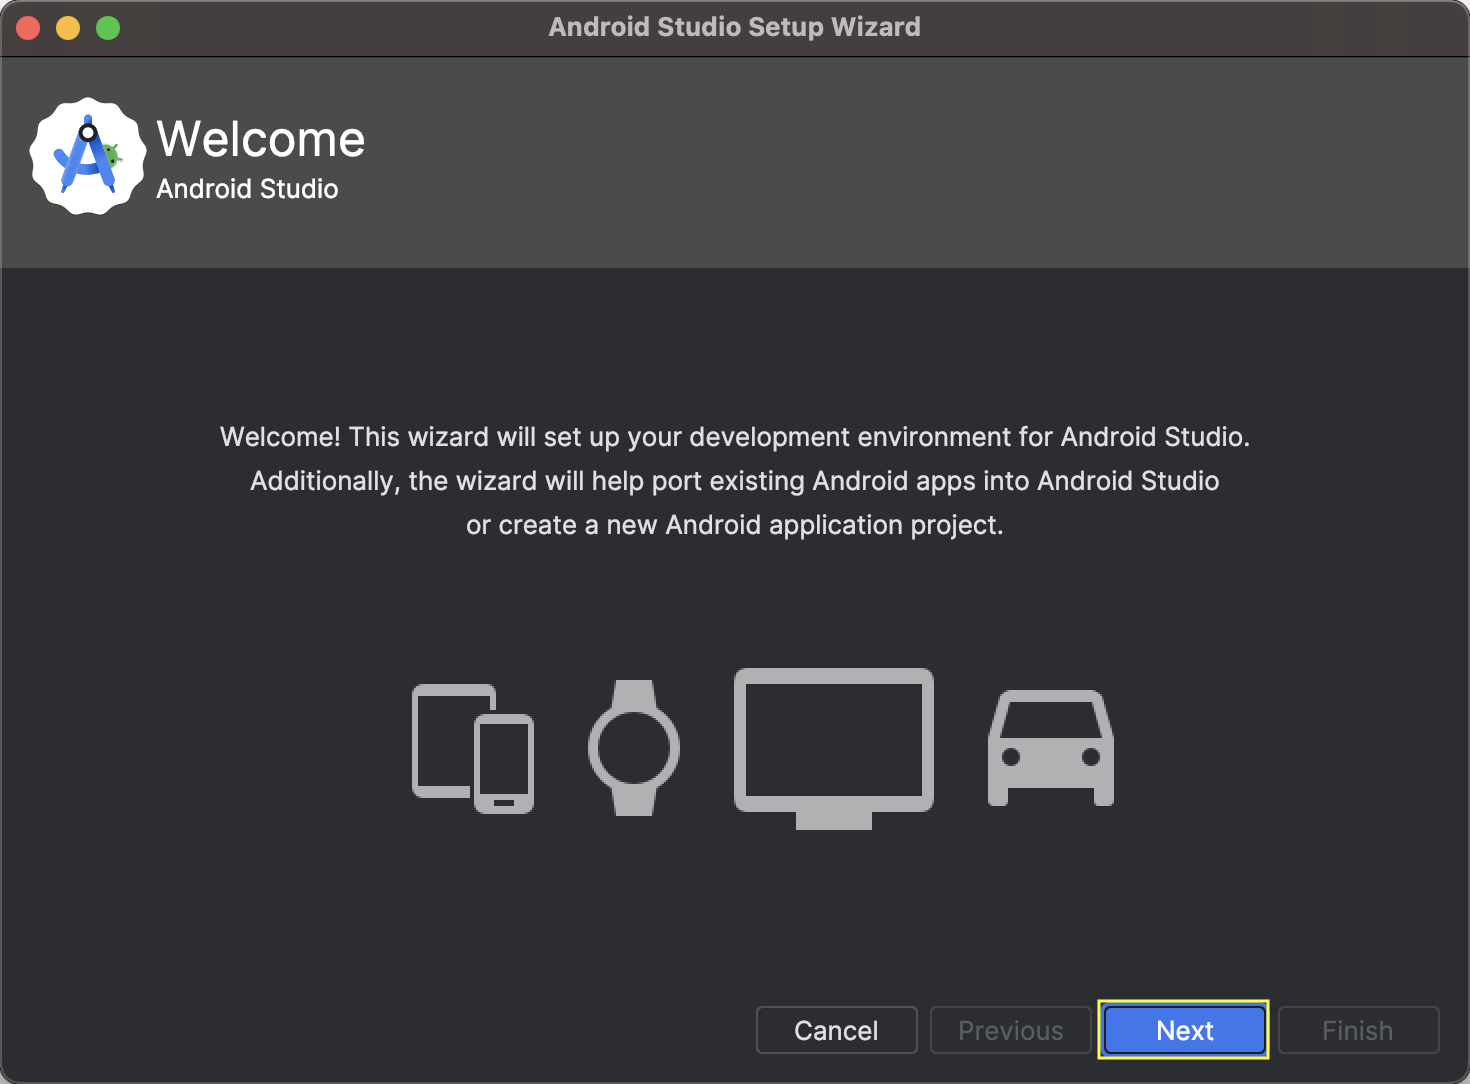
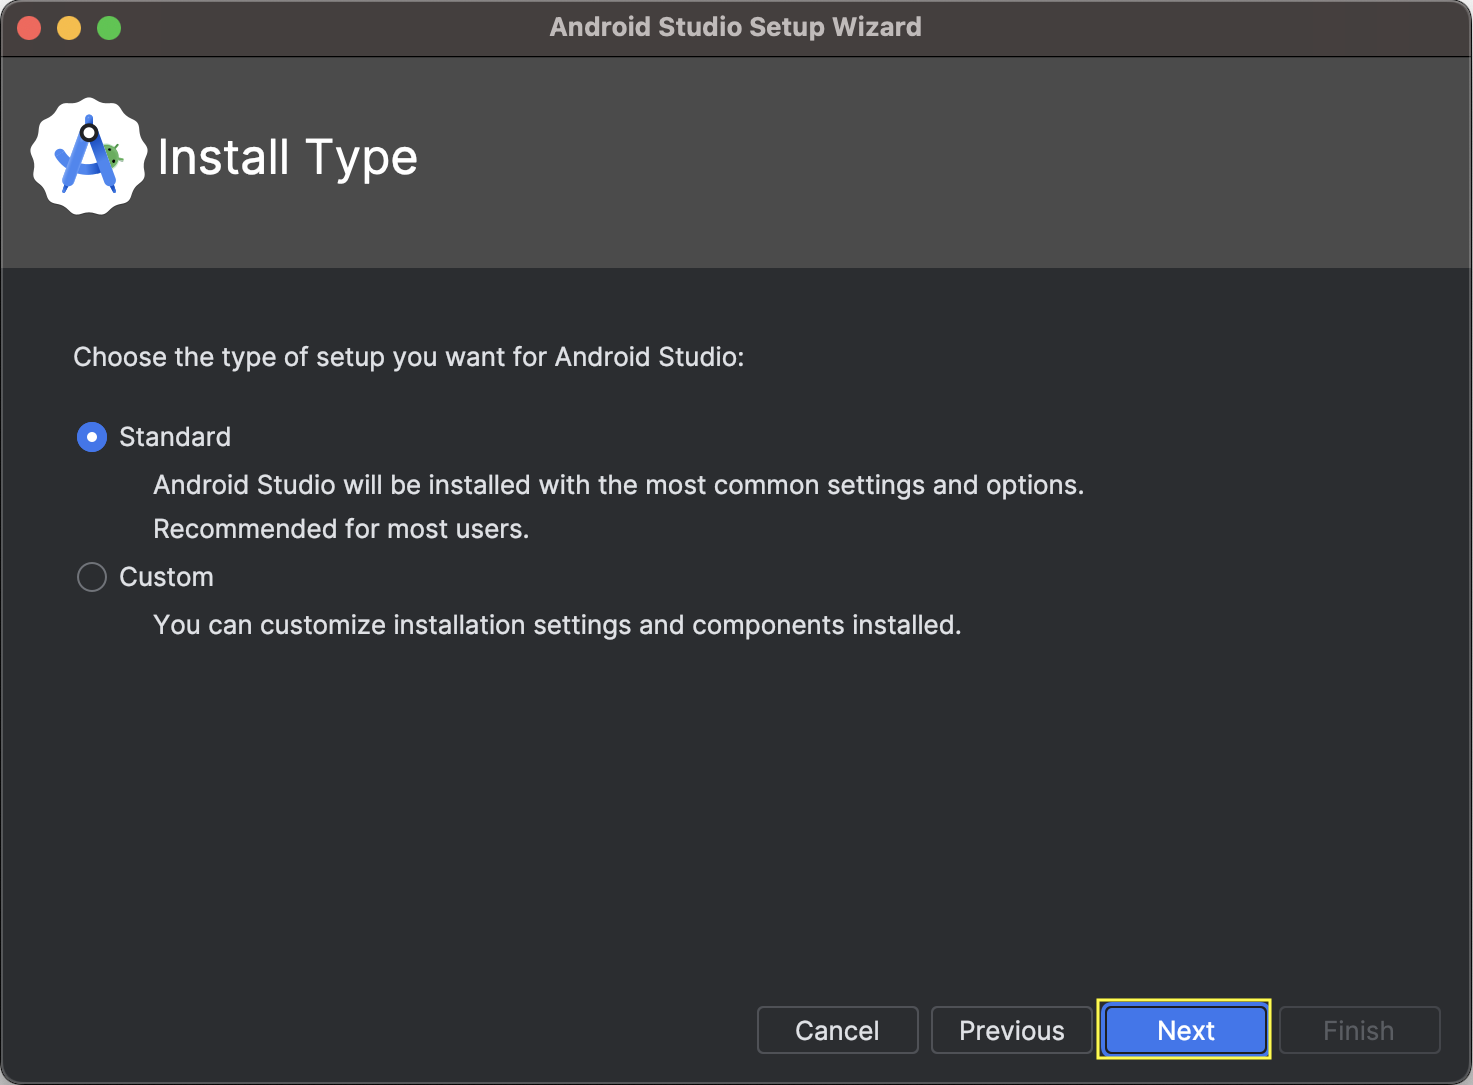
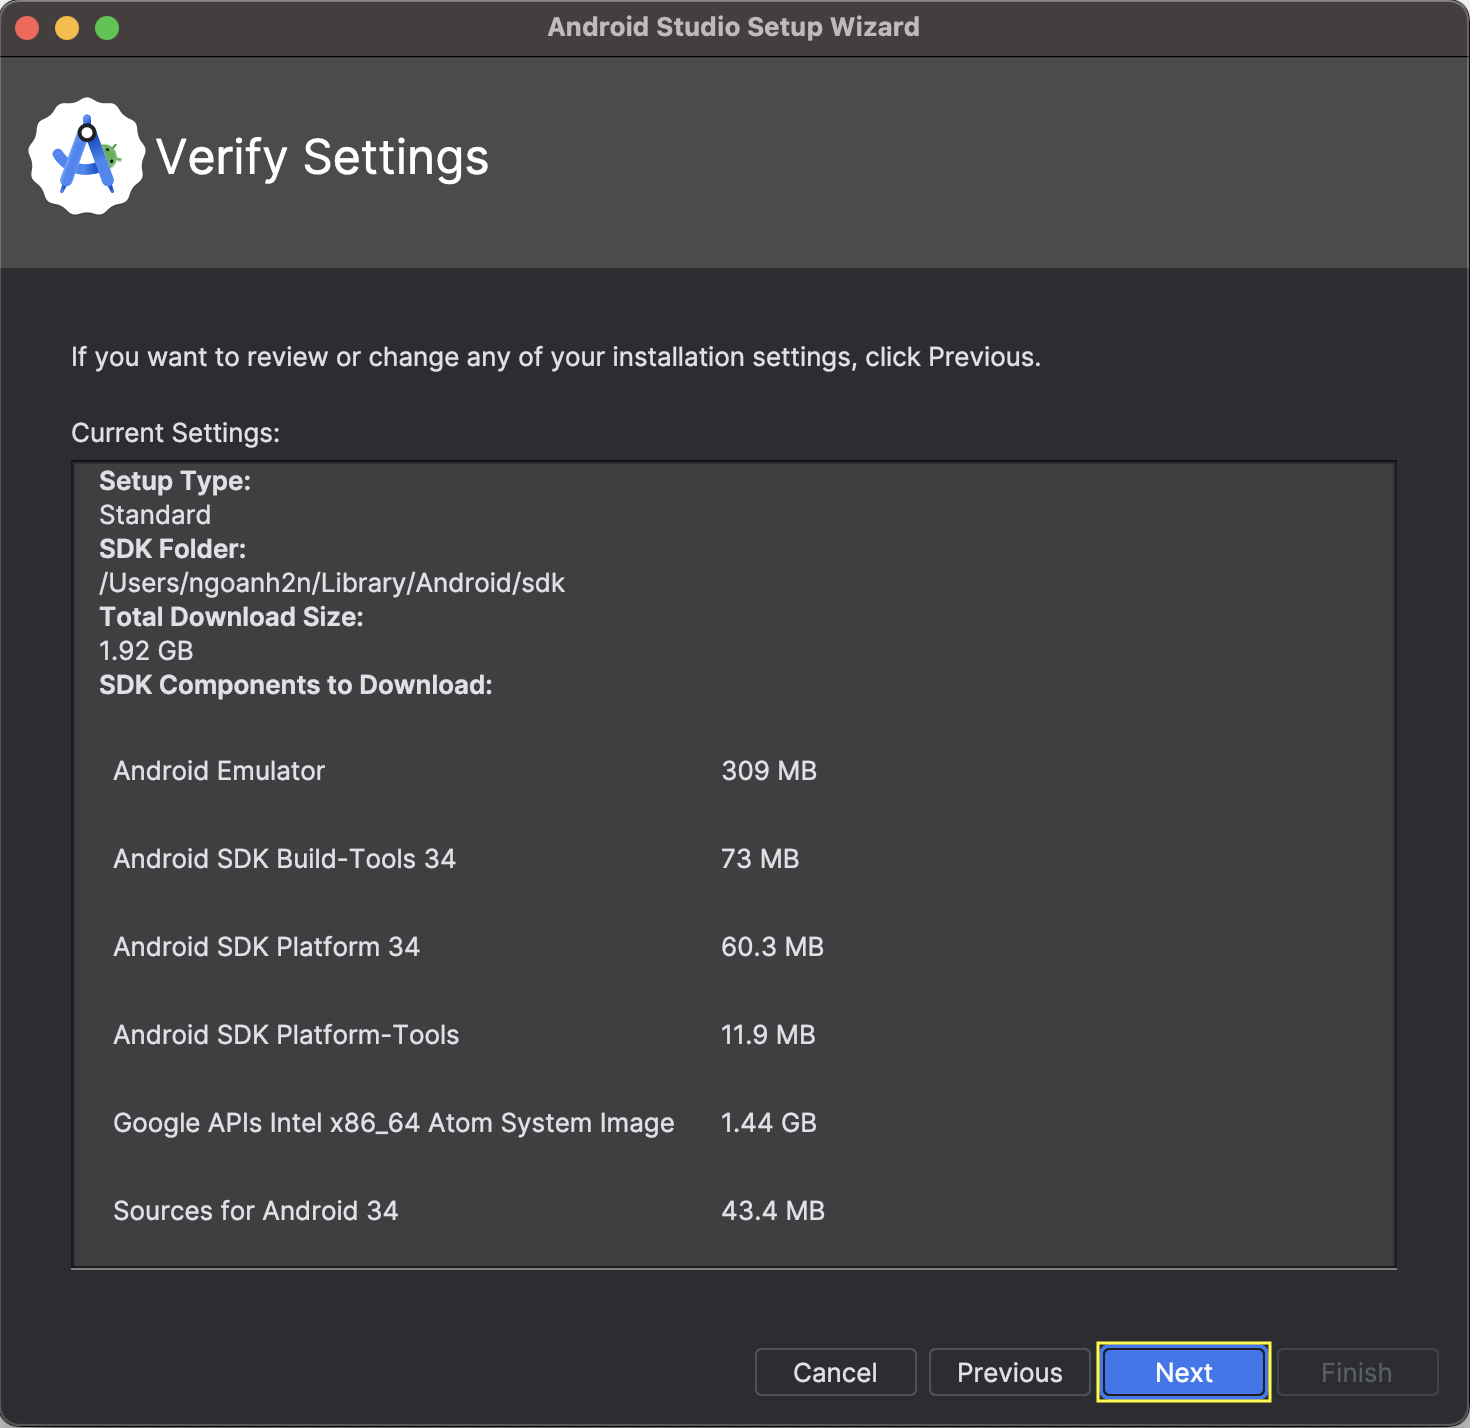
- Open
Android StudioWelcome>NextInstall Type>NextVerify Settings>NextLicense Agreement>Acceptlicenses >Finish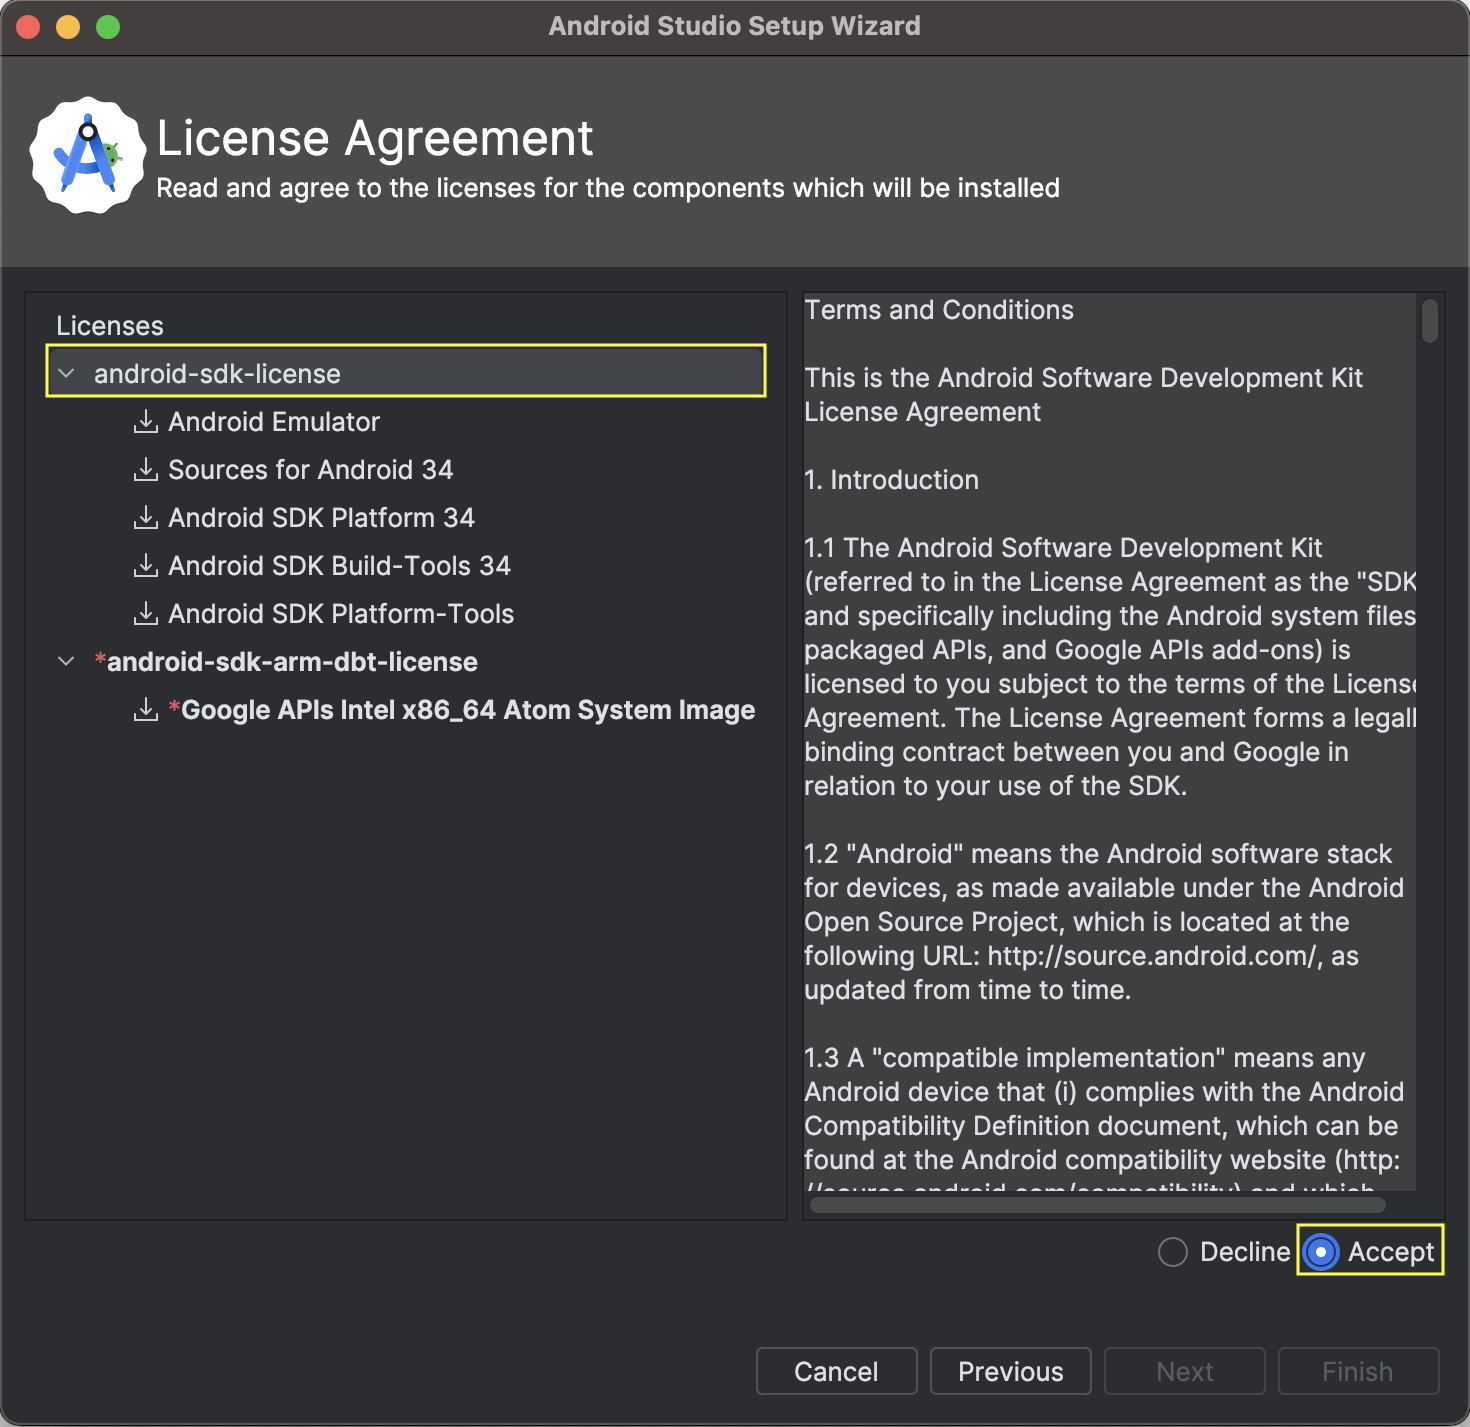
Downloading Components>Finish🔘 Download
When missing Android SDK Components. That means, you have NOT installed environment yet as above.
✅ SDK Manager
- Open
Android Studio- Open
Settings
Navigation route:More Actions>SDK Manager✅ Settings
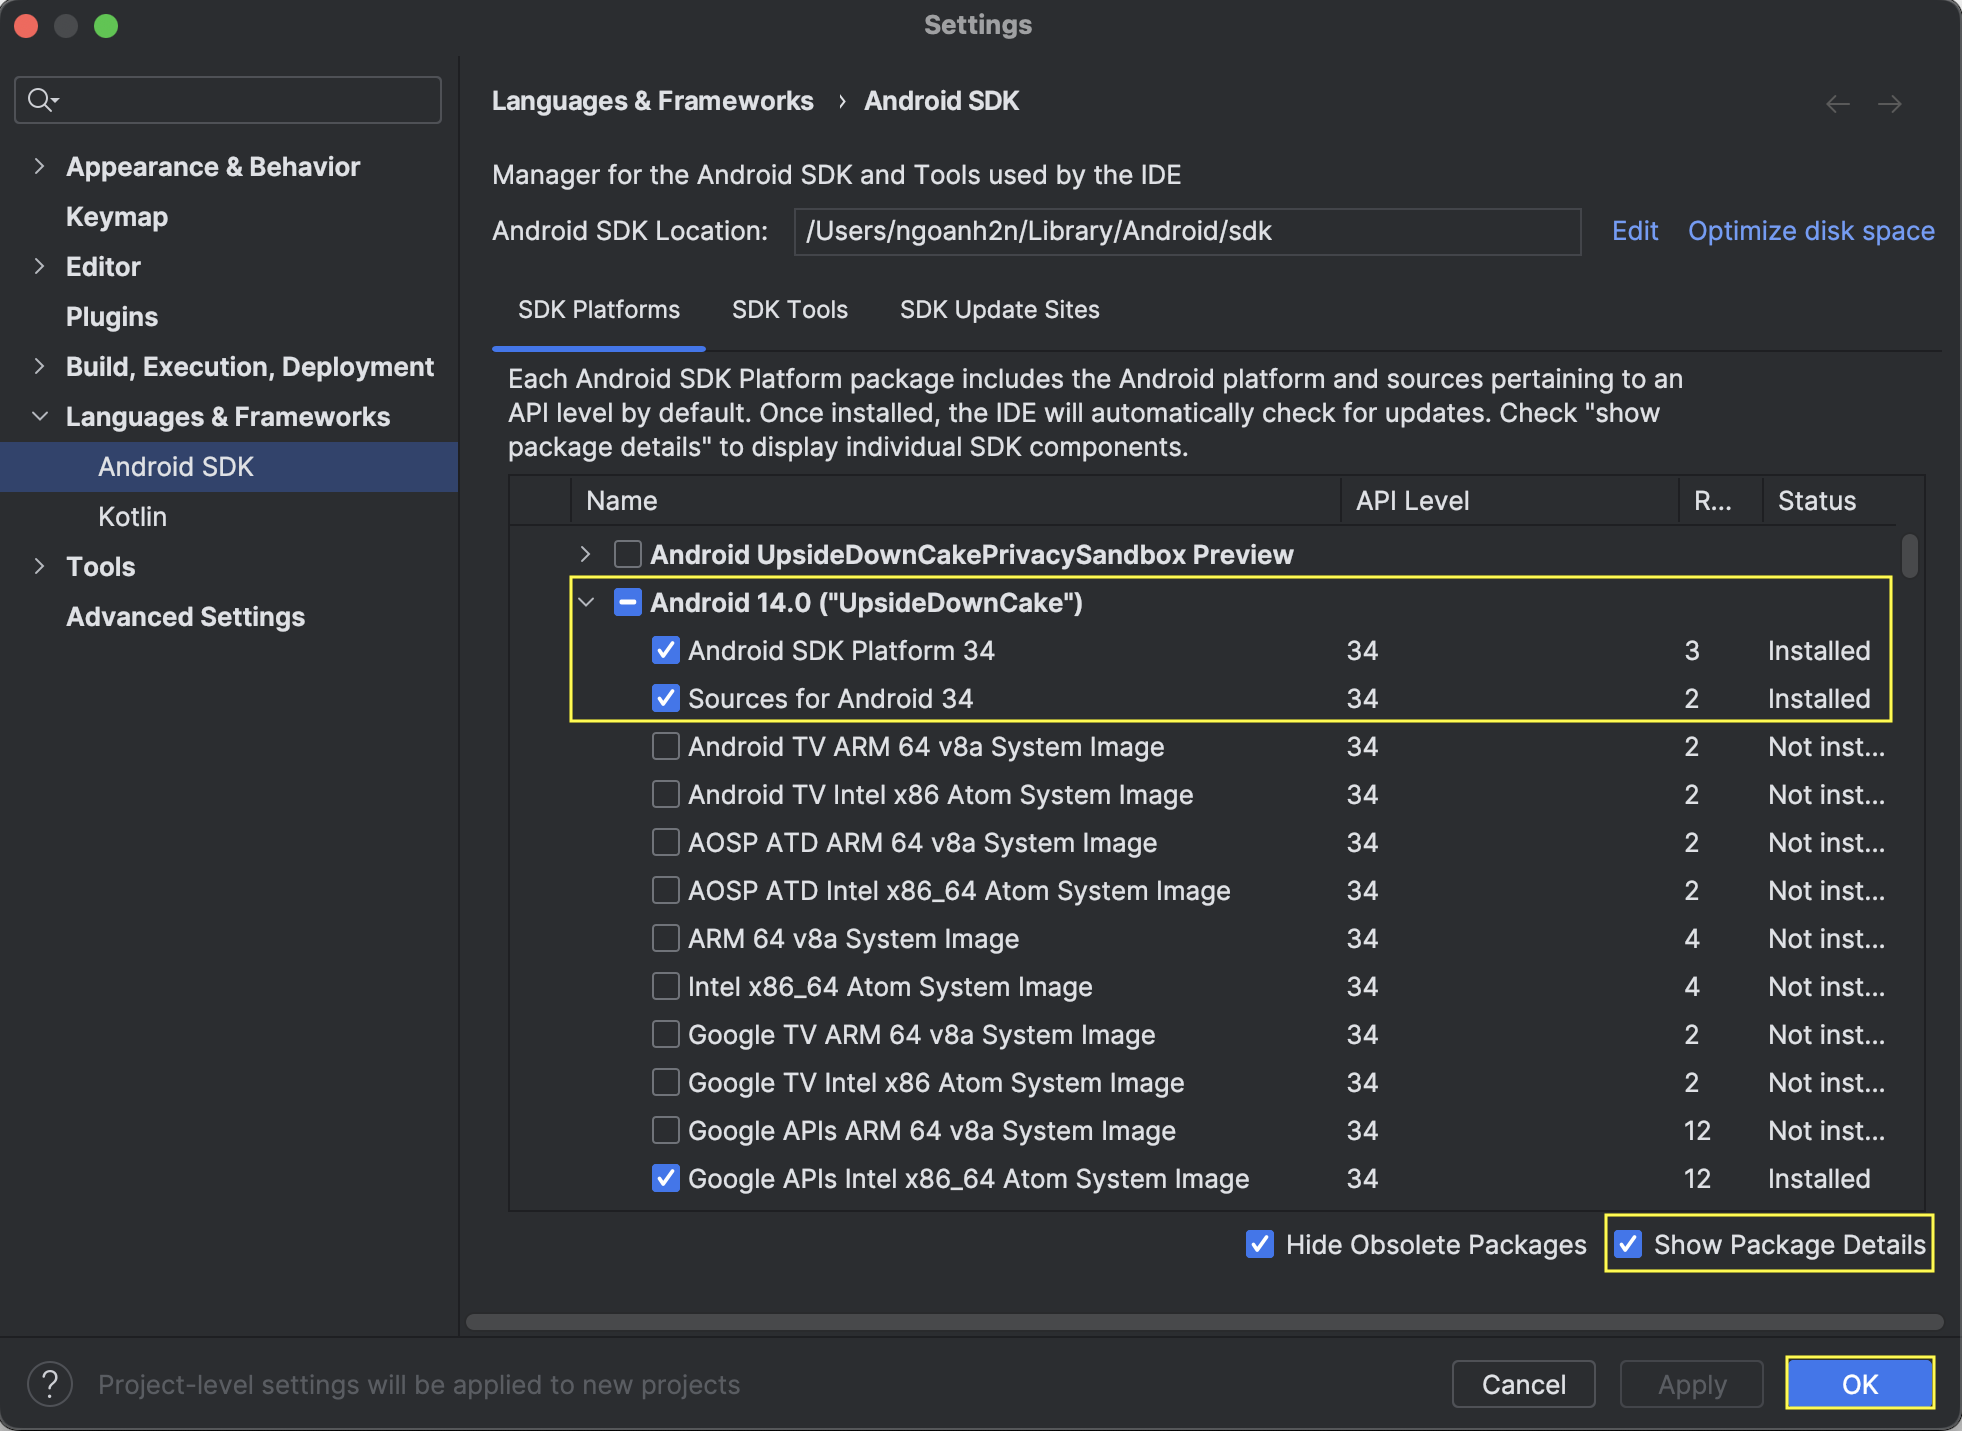
✅ SDK Platforms
☑
Show Package Details
☑Android XX.X
☑Android SDK Platform XX
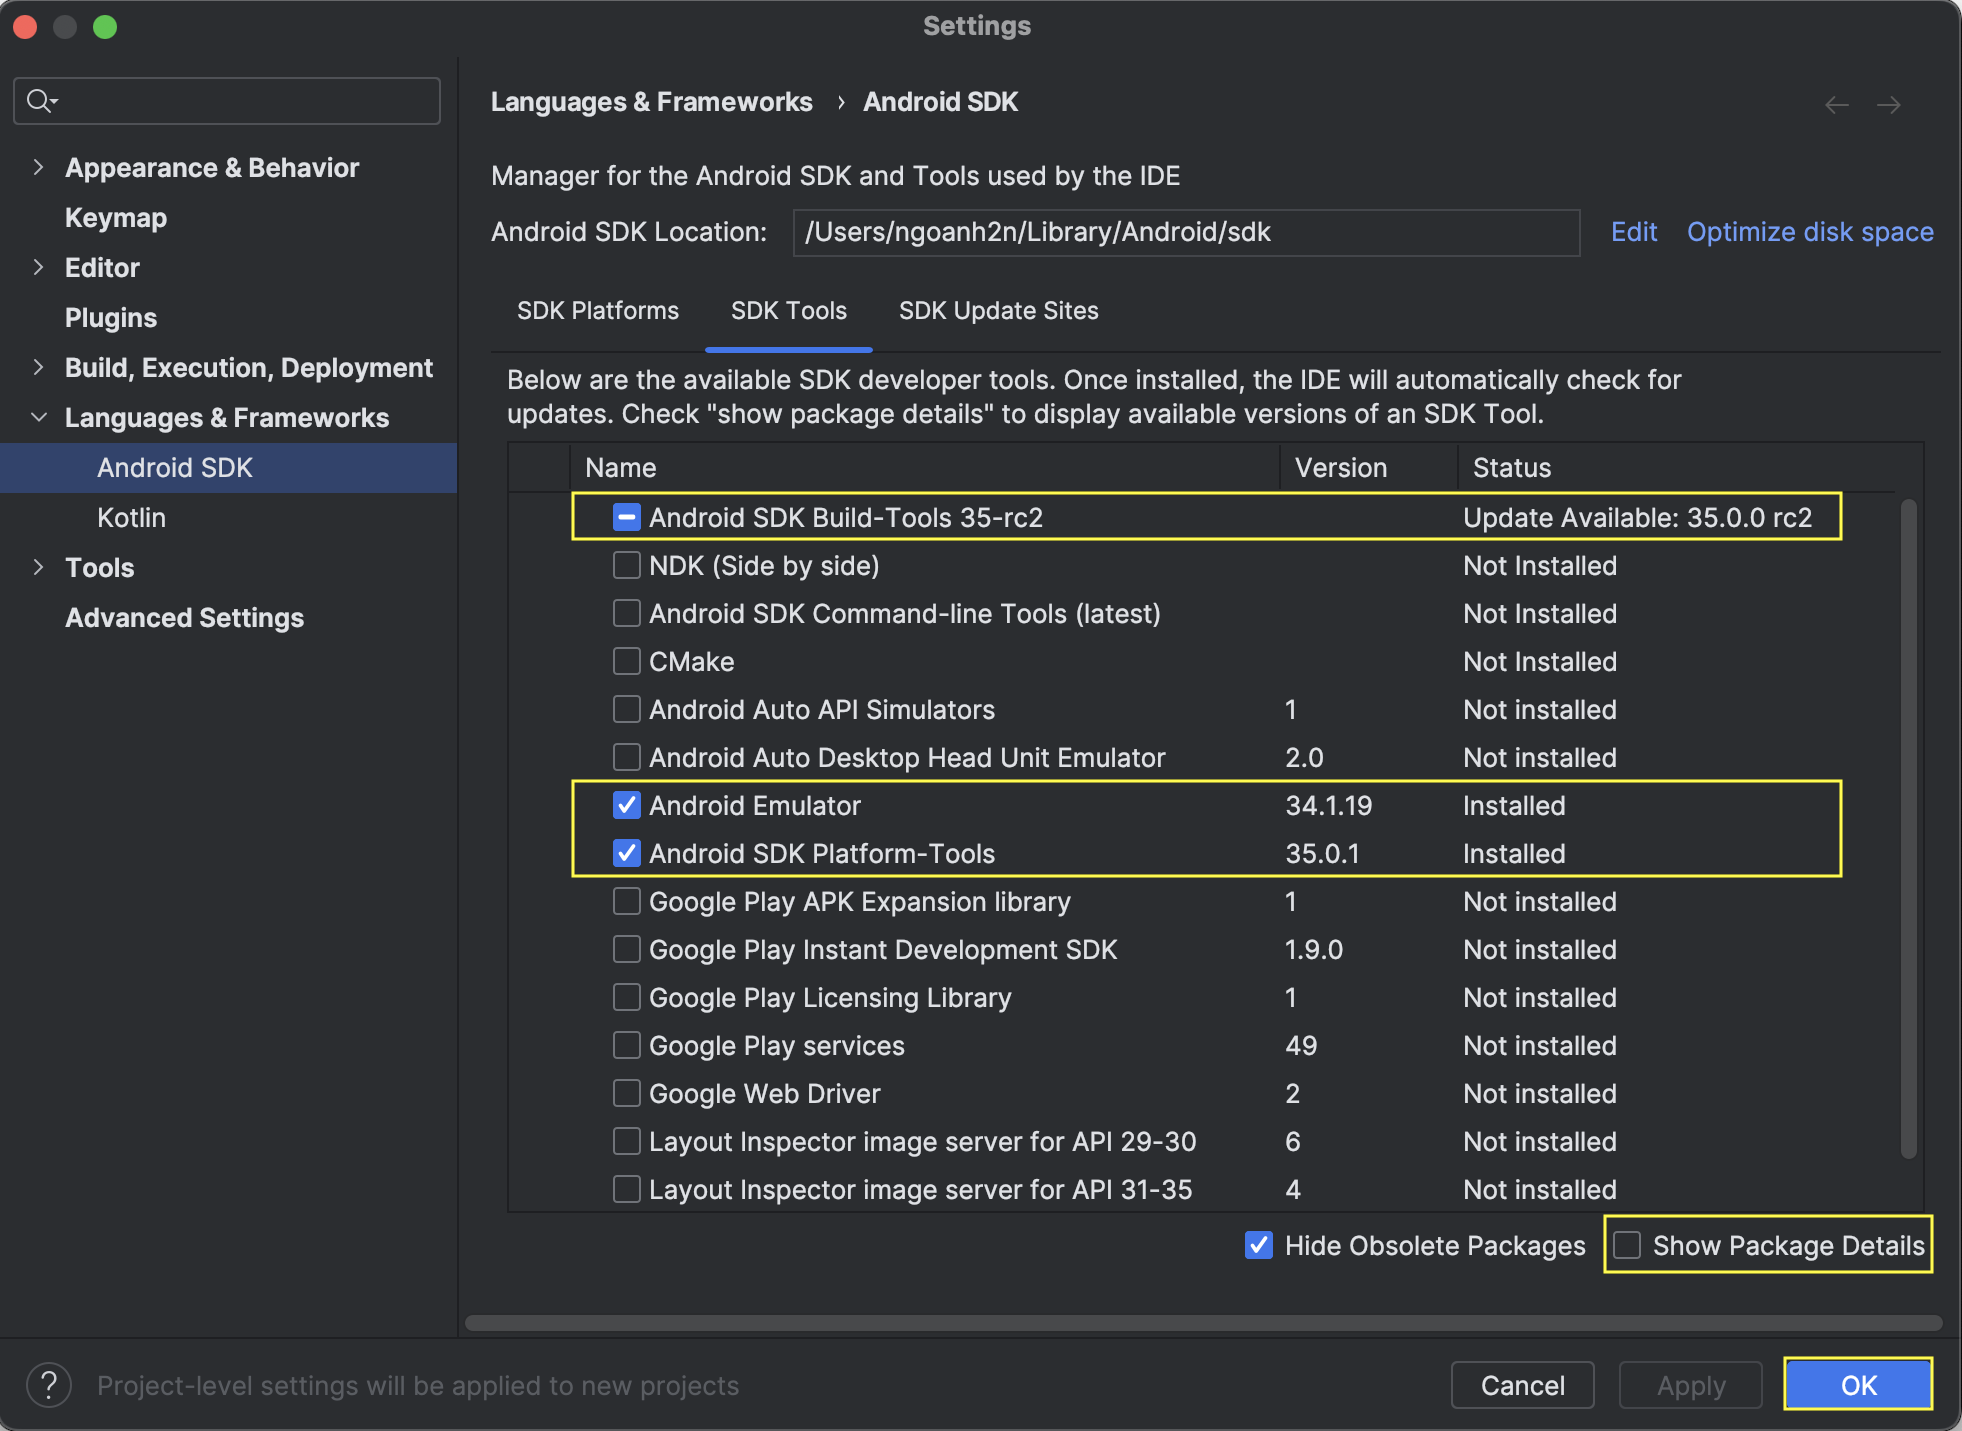
☑Sources for Android XX✅ SDK Tools
☑
Show Package Details
☑Android SDK Build-Tools XX
☑XX.0.0
☑Android Emulator
☑Android SDK Platform-Tools

Emulator
✅ Creating
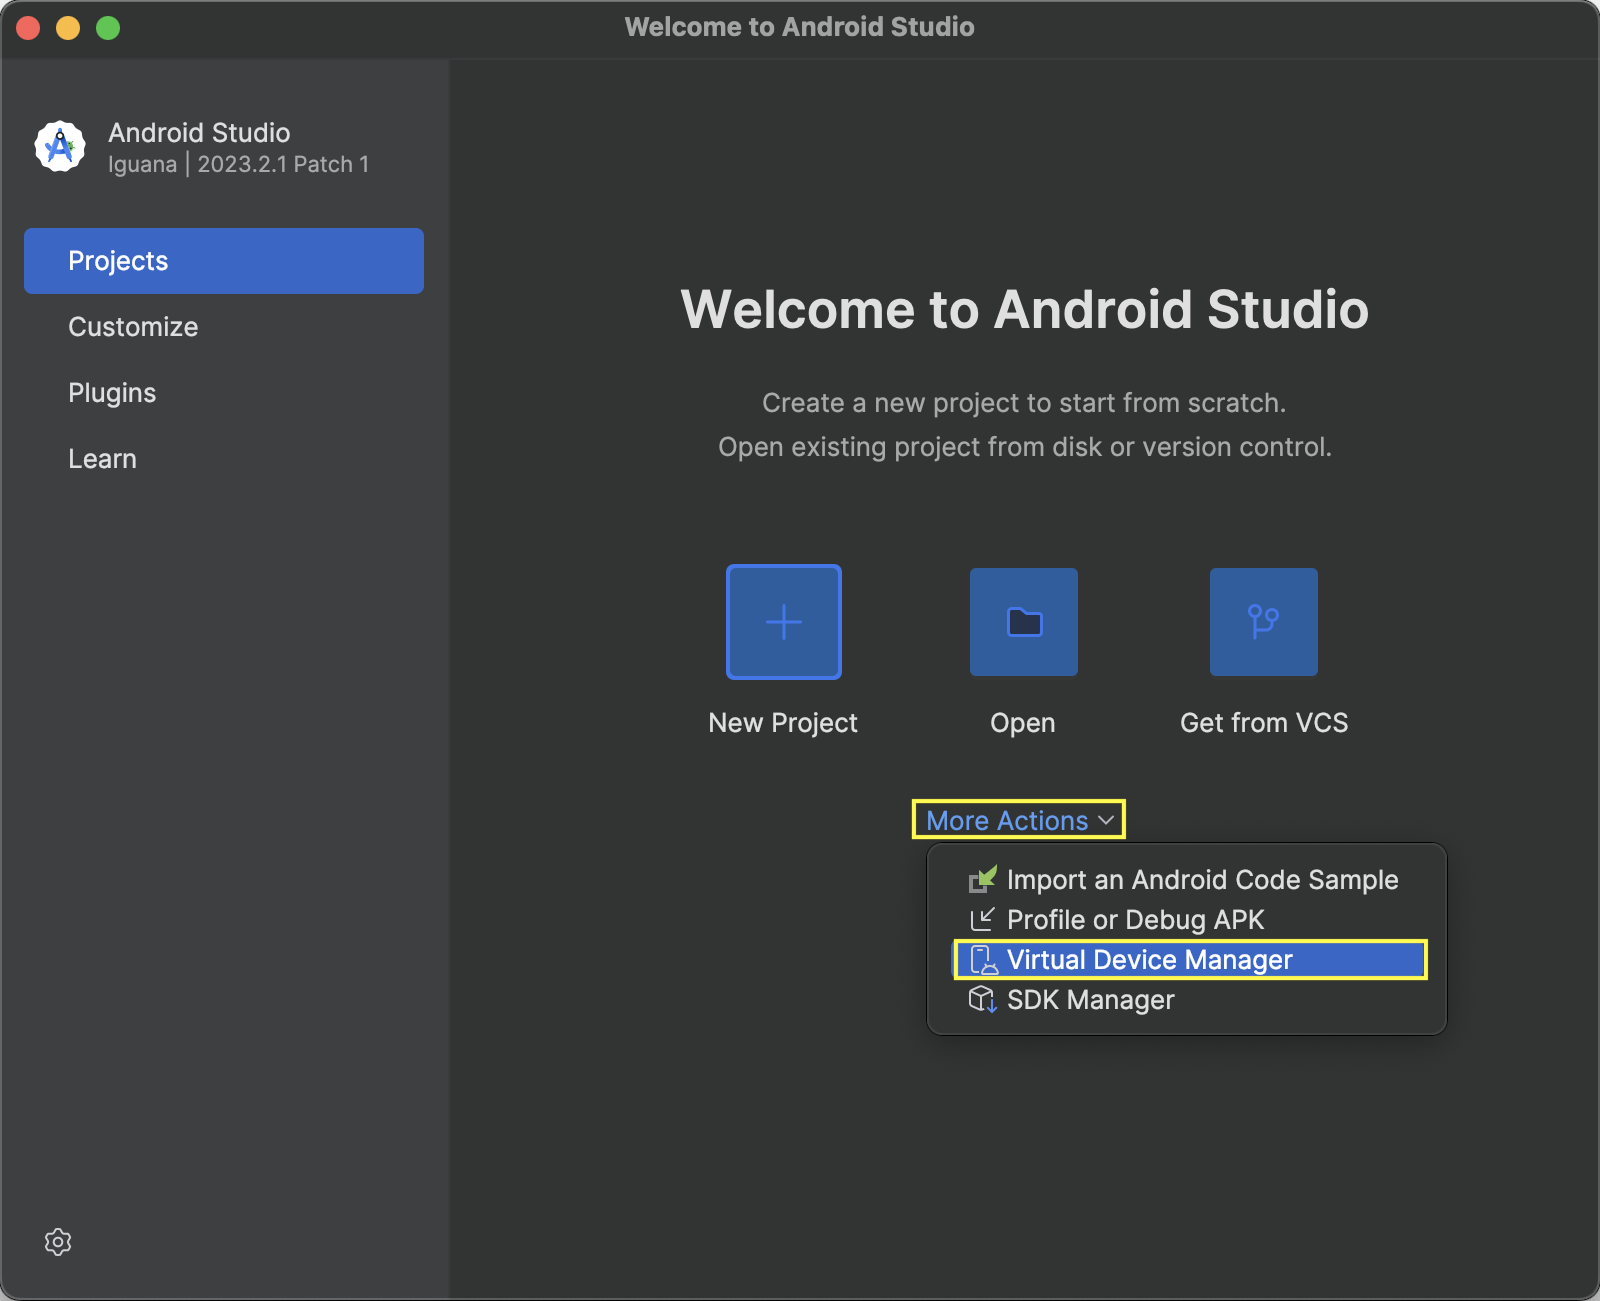
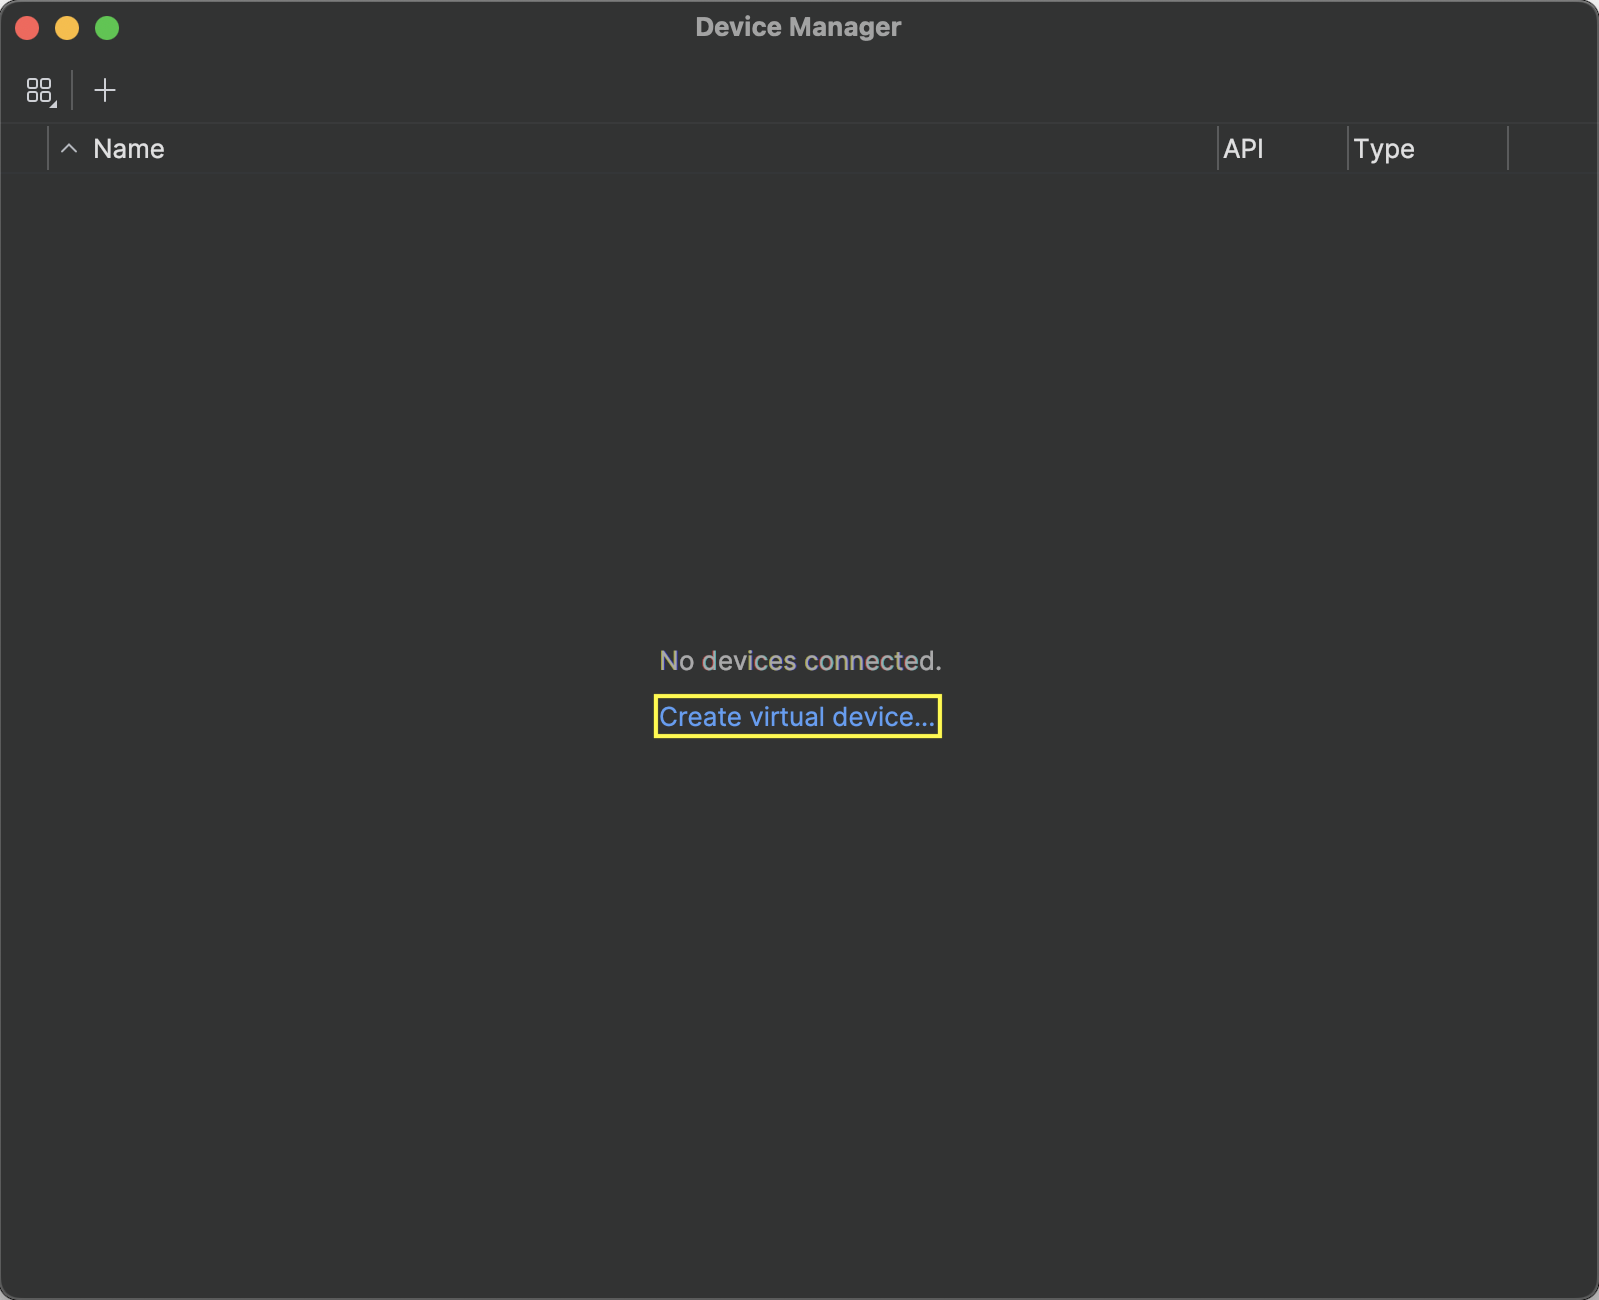
✅ Virtual Device Manager
- Open
Android Studio- Open
Device Manager
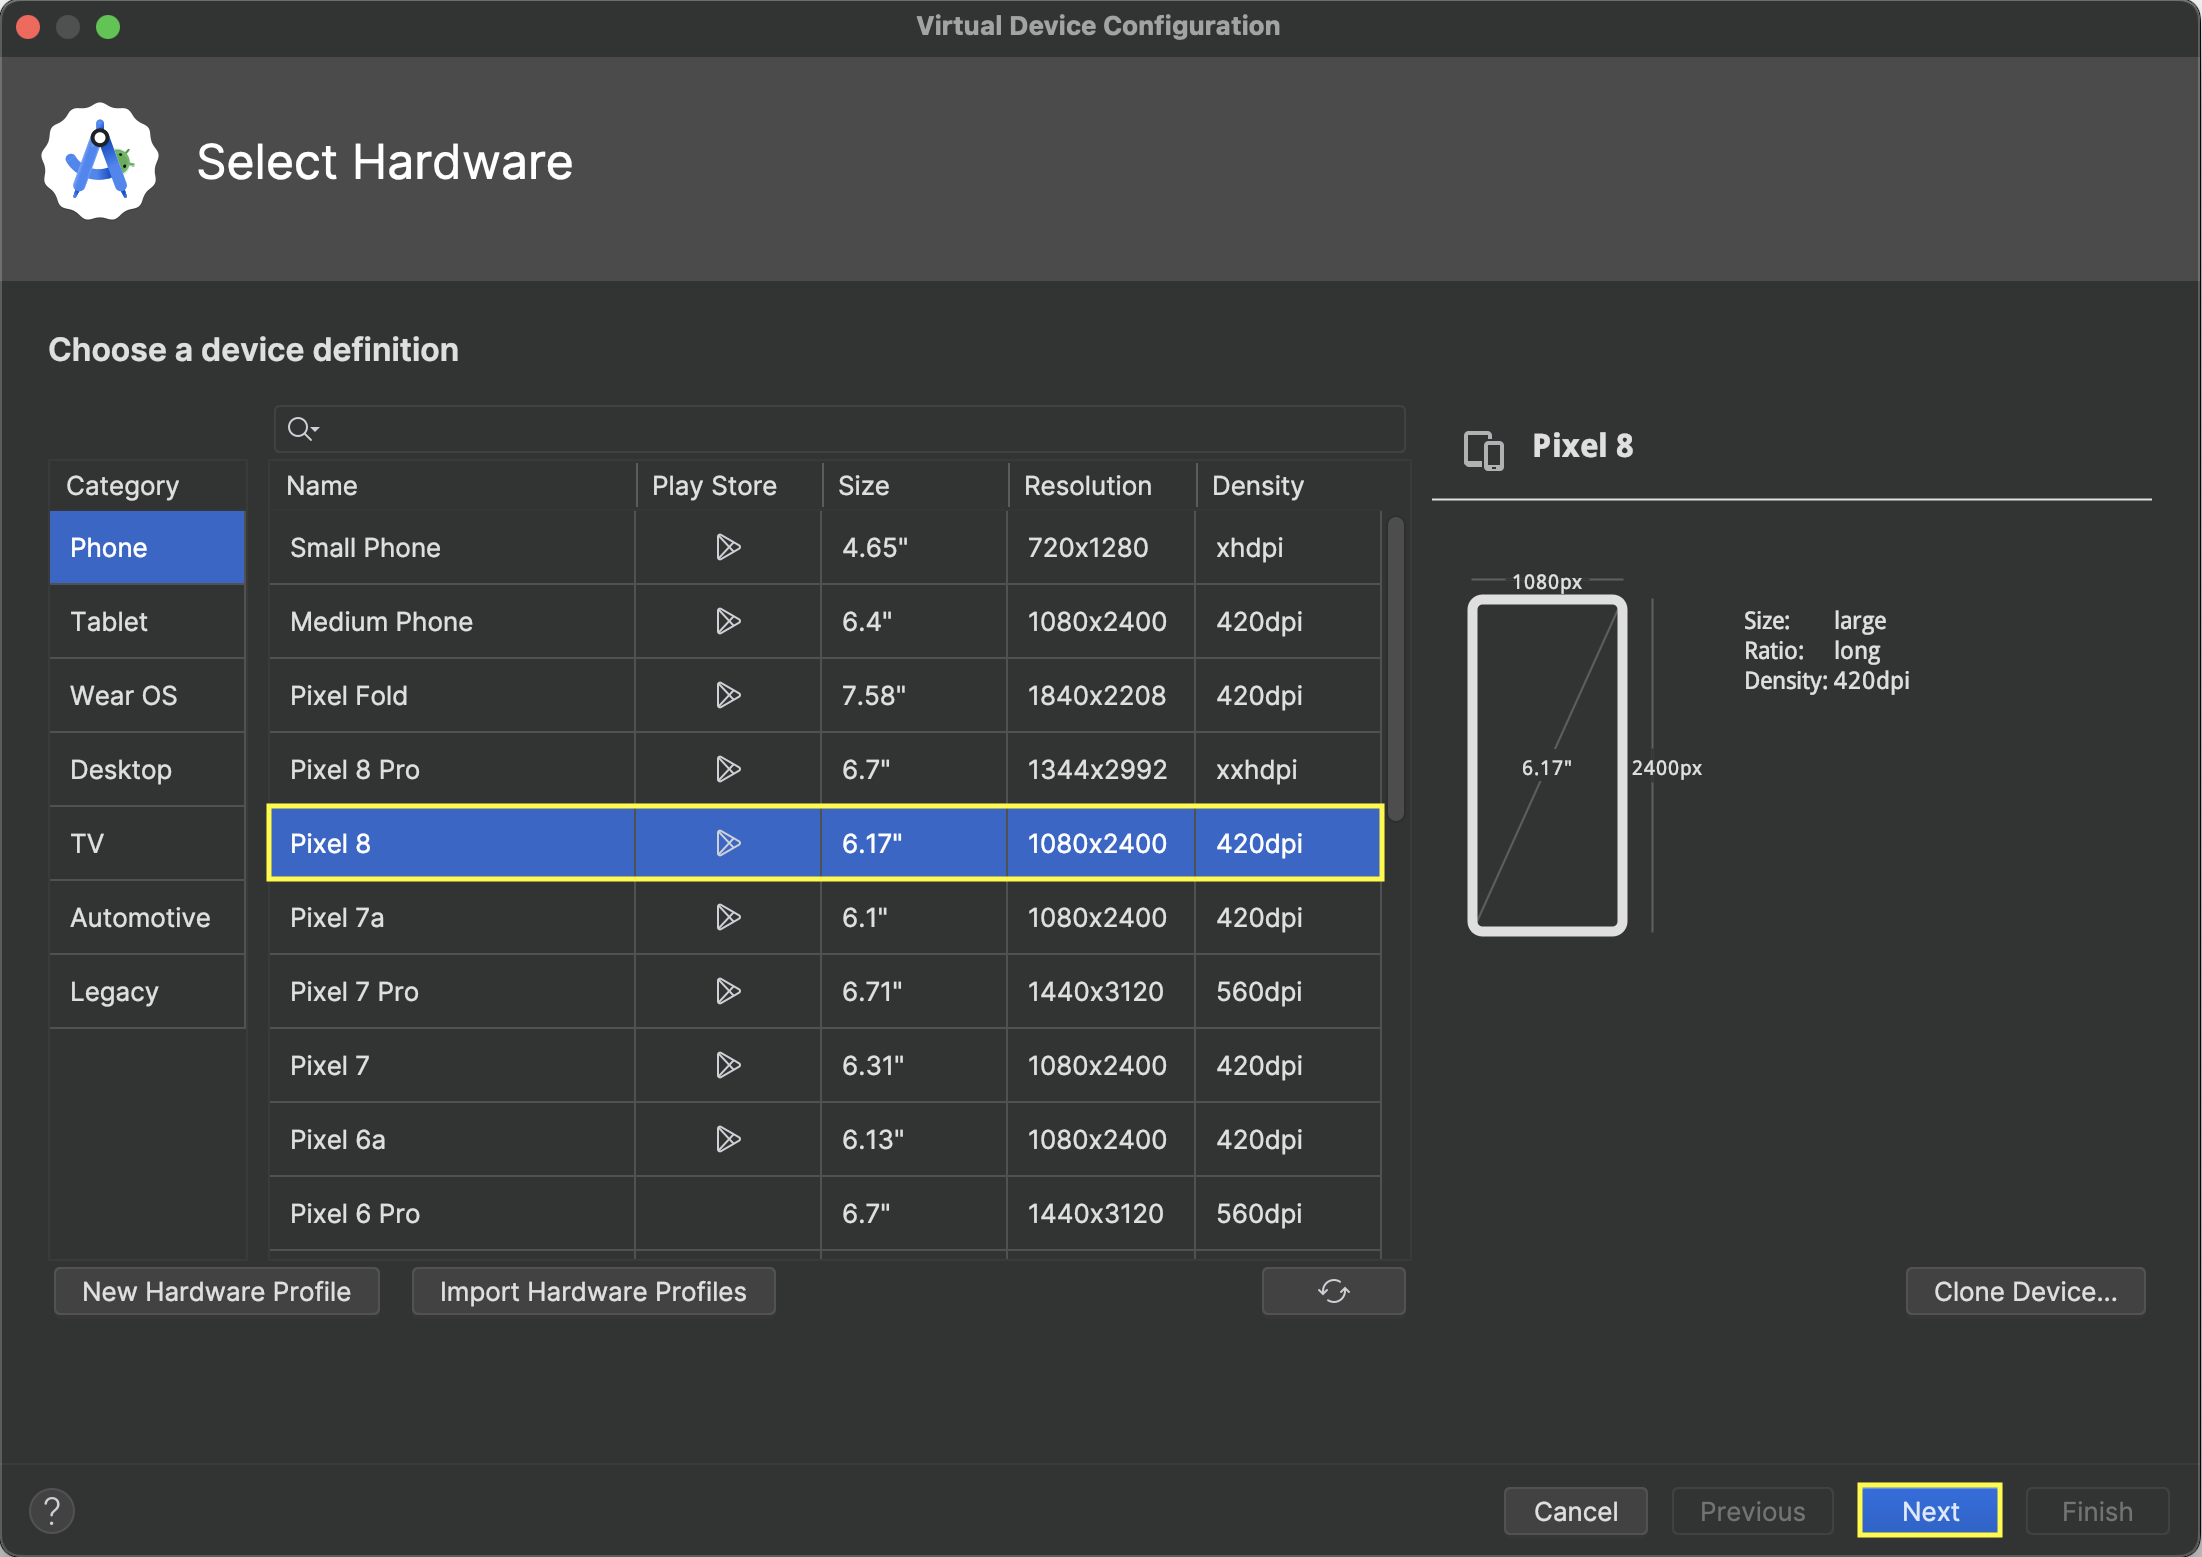
Navigation route:More Actions>Virtual Device Manager✅ Virtual Device Configuration
Create Virtual Device- Select Device >
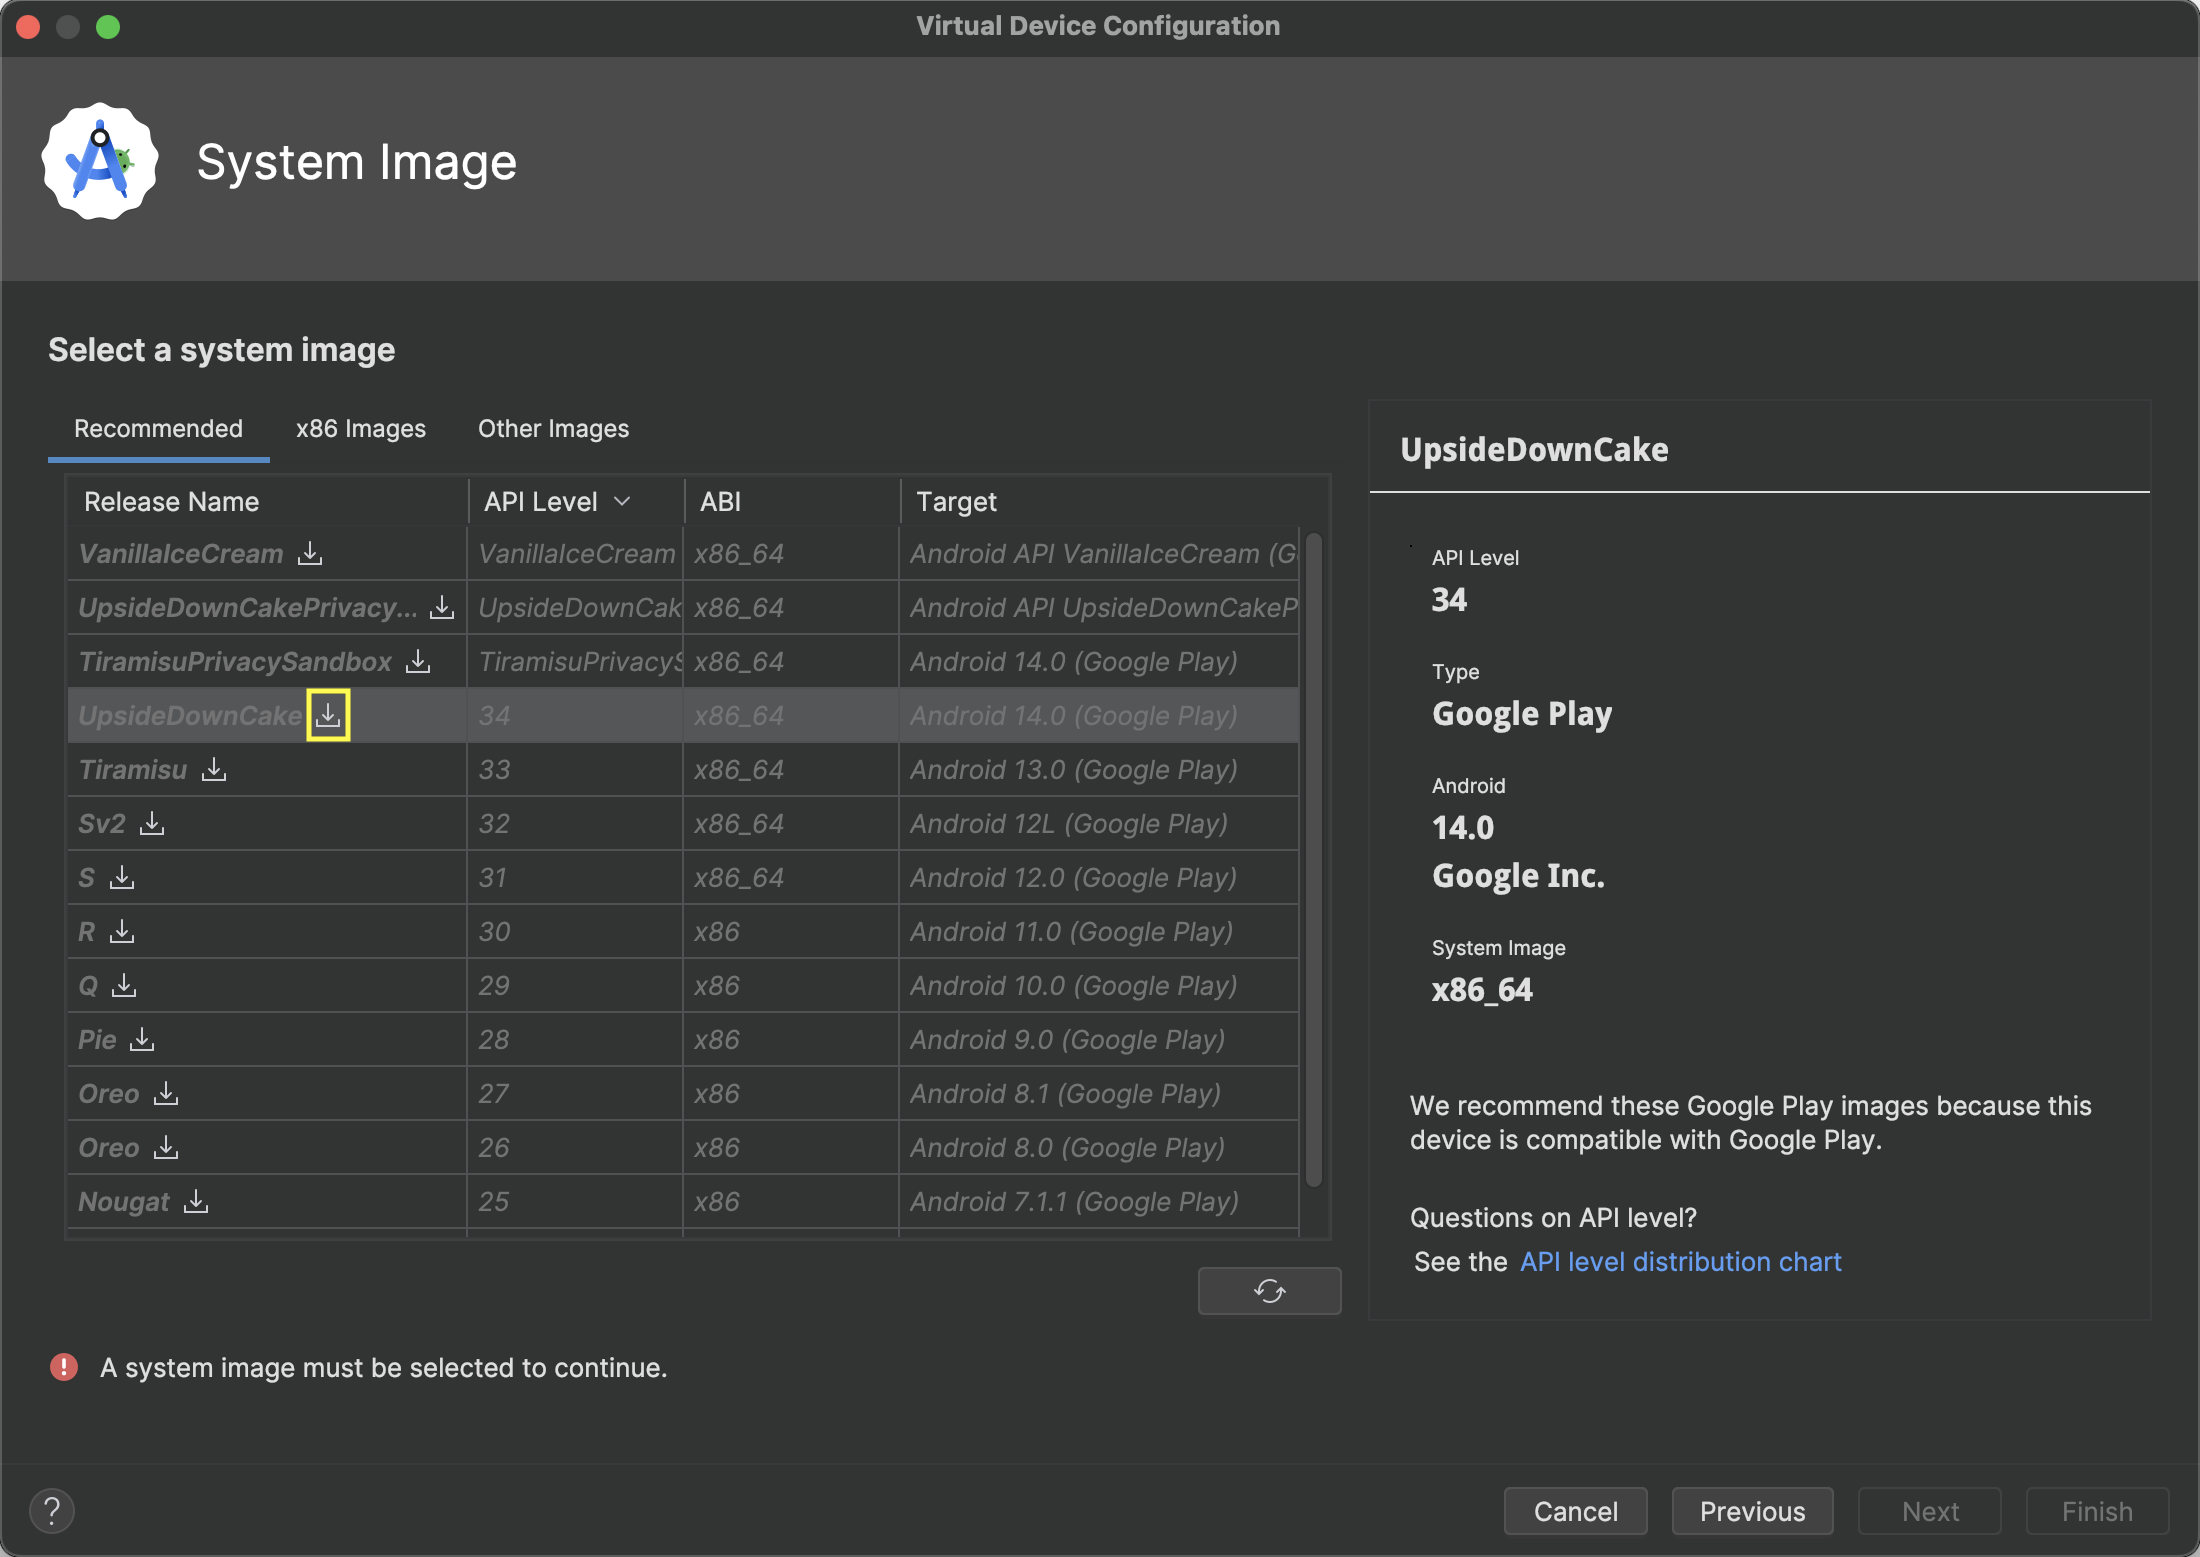
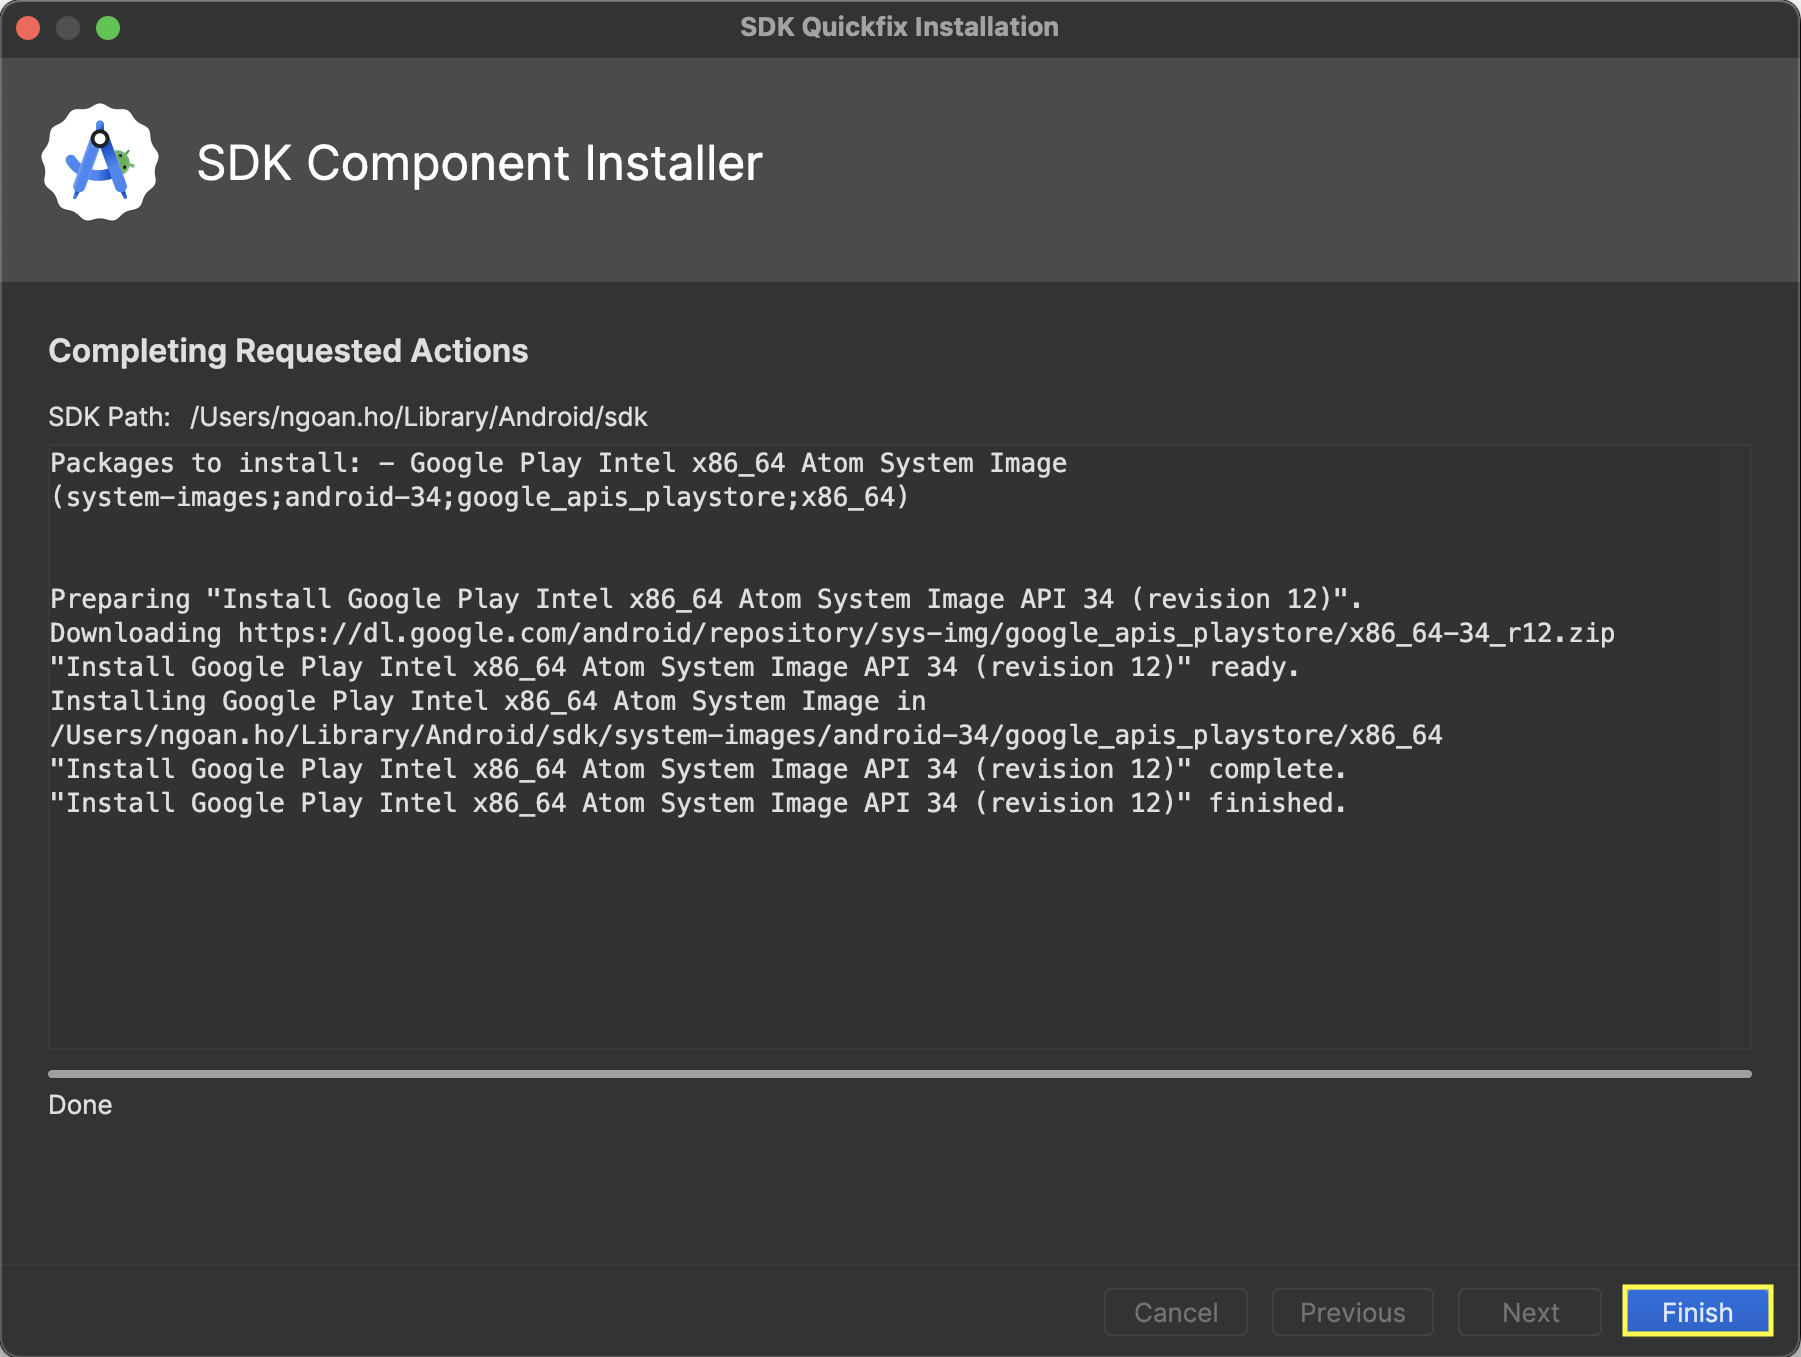
Next- Download System Image: Click Download icon
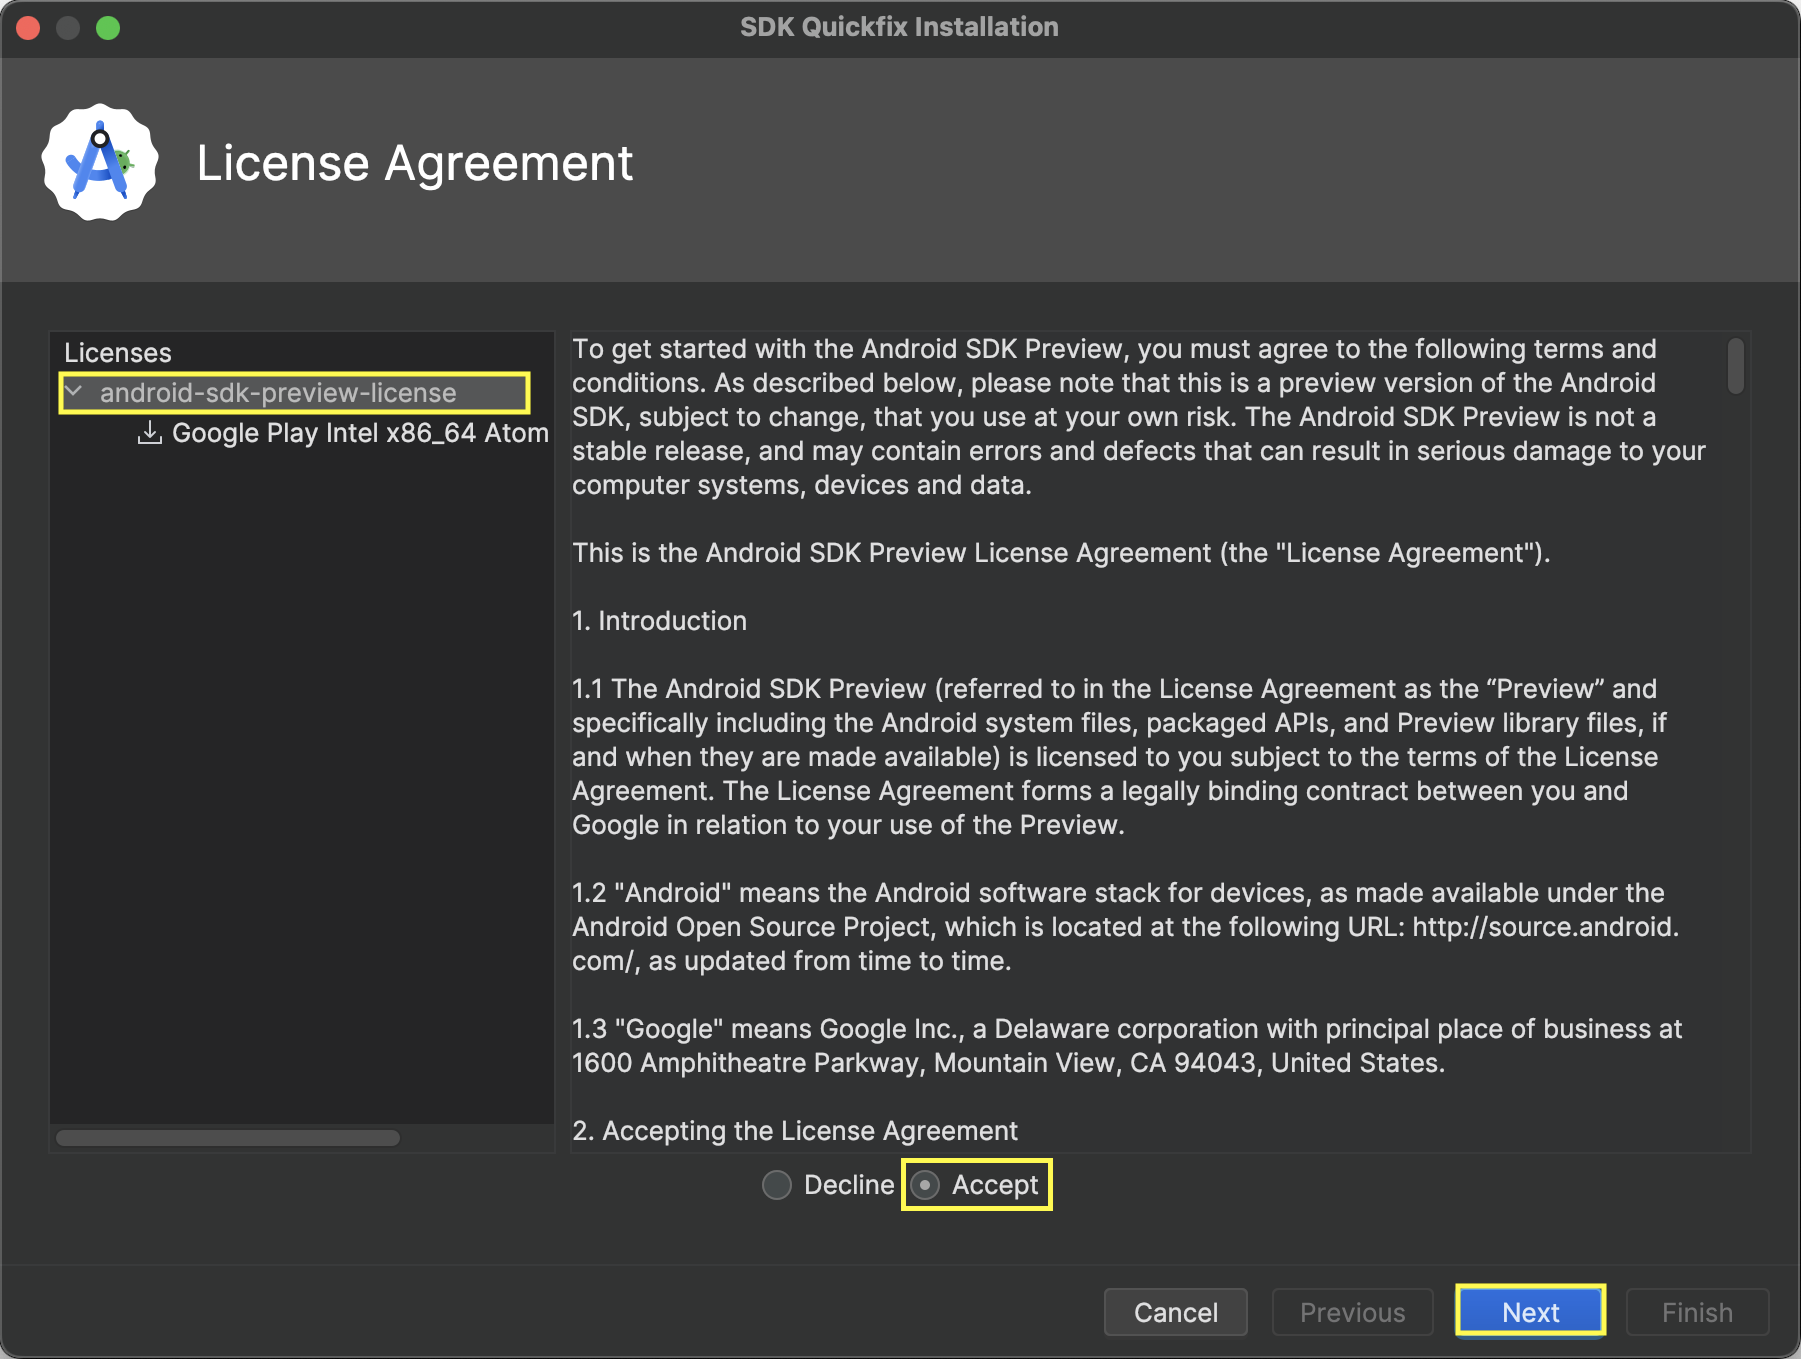
- Agree License:
Accept>Next- Complete Requested Actions:
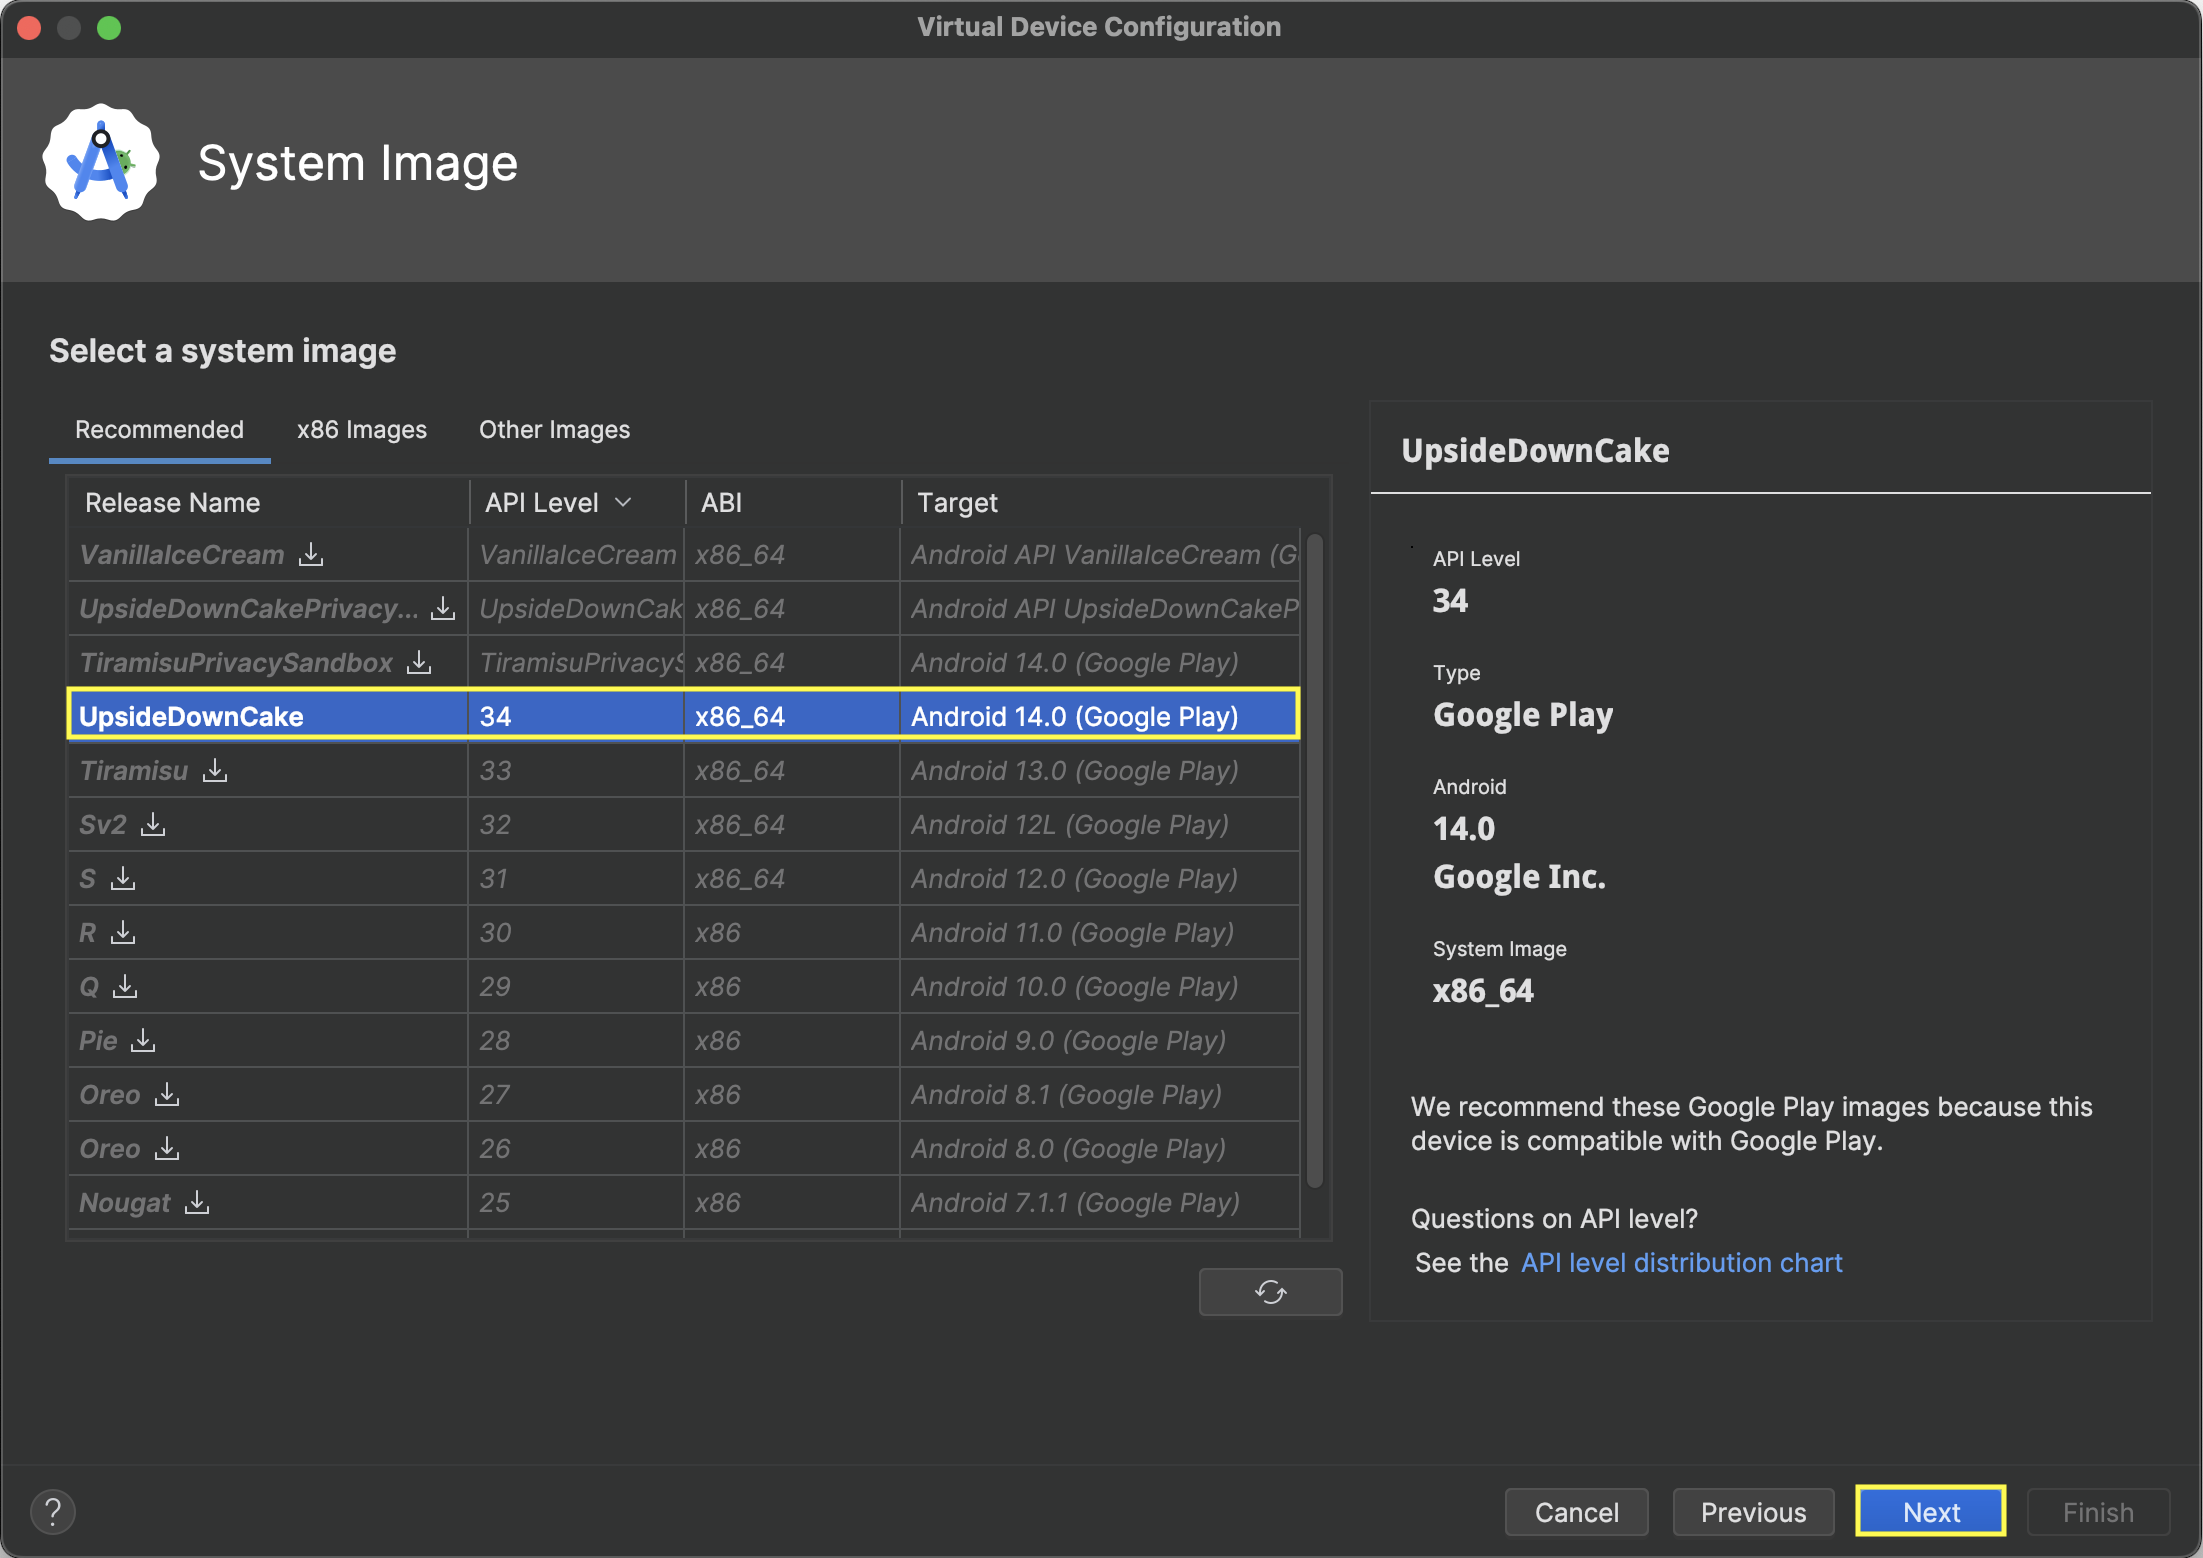
Finish- Select System Image >
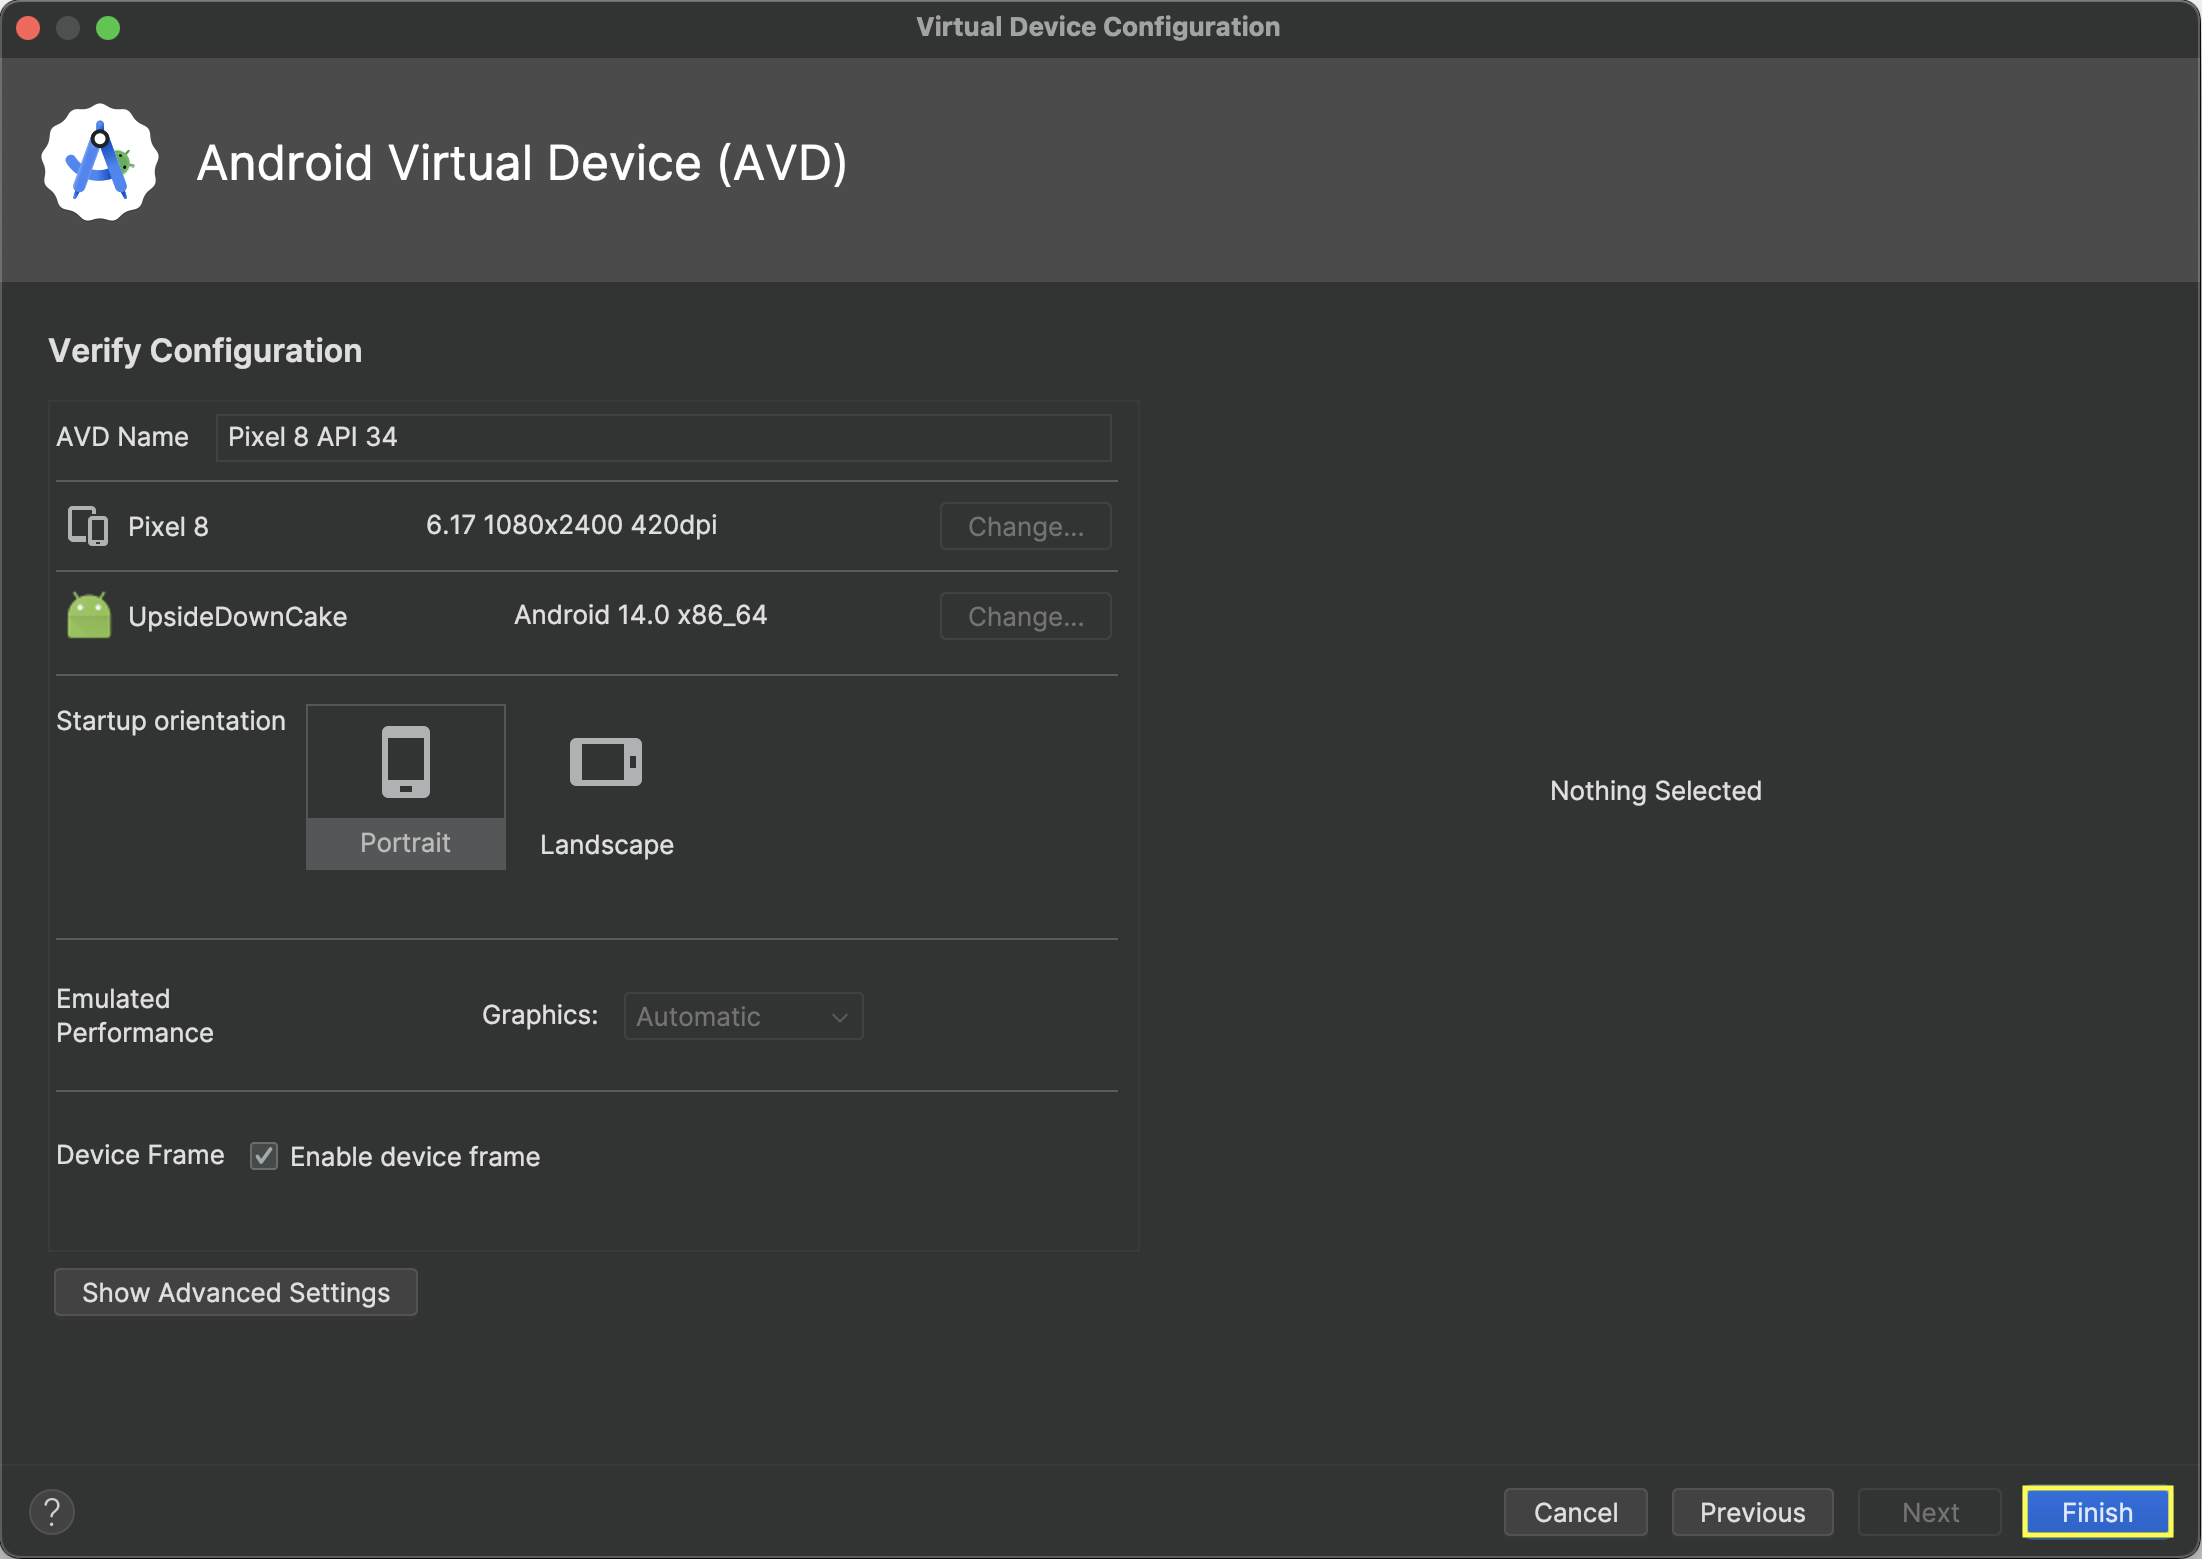
Next- Verify Configuration >
Finish- Verify Virtual Devices

Android Home
macOS
✅ Setting
By default, SDK location is
/Users/{USER}/Library/Android/sdk.
The environment variables that need to be set in the following:
ANDROID_HOME- Tools:
- Platform Tools:
adb- Build Tools:
apksigner- Command-Line Tools:
avdmanager,sdkmanager,apkanalyzer- Emulator:
emulator,mksdcardecho "export ANDROID_HOME=/Users/{USER}/Library/Android/sdk" >> ~/.zshrc echo "export PATH=\$PATH:\$ANDROID_HOME/platform-tools" >> ~/.zshrc echo "export PATH=\$PATH:\$ANDROID_HOME/build-tools/{API_LEVEL}" >> ~/.zshrc echo "export PATH=\$PATH:\$ANDROID_HOME/cmdline-tools/{CMD_TOOLS_VERSION}/bin" >> ~/.zshrc echo "export PATH=\$PATH:\$ANDROID_HOME/emulator" >> ~/.zshrc☑ Replace
{USER}by your current username
☑ Replace{API_LEVEL}(E.g.34.0.0)
☑ Replace{CMD_TOOLS_VERSION}(E.g.13.0)
🔲 Validation
source ~/.zshrc
echo $ANDROID_HOME
adb --version
Windows
✅ Setting
By default, SDK location is
C:\Users\{USER}\AppData\Local\sdk.
The environment variables that need to be set in the following:
ANDROID_HOME- Tools:
- Platform Tools:
adb- Build Tools:
apksigner- Command-Line Tools:
avdmanager,sdkmanager,apkanalyzer- Emulator:
emulator,mksdcardsetx /m ANDROID_HOME "C:\Users\{USER}\AppData\Local\sdk" & refreshenv setx /m PATH "%PATH%;%ANDROID_HOME%\platform-tools" & refreshenv setx /m PATH "%PATH%;%ANDROID_HOME%\build-tools\{API_LEVEL}" & refreshenv setx /m PATH "%PATH%;%ANDROID_HOME%\cmdline-tools\{CMD_TOOLS_VERSION}\bin" & refreshenv setx /m PATH "%PATH%;%ANDROID_HOME%\emulator" & refreshenv☑ Open
Command Promptwith administrator privileges
☑ Replace{USER}by your current username
☑ Replace{API_LEVEL}(E.g.34.0.0)
☑ Replace{CMD_TOOLS_VERSION}(E.g.13.0)
🔲 Validation
echo %ANDROID_HOME%
adb --version